
Sending a broadcast to your panel
Use this when you want to email everyone on your panel, or a group of them. For example:
- an announcement, like thanking your panel and sharing what their feedback changed this year
- a policy update, like a change to your privacy notice or how long you keep their data
- a short survey, with a link to a few quick questions in your own survey tool
Each person gets a separate email, sent only to them, so nobody’s email address is shared with the rest of the panel.
Inviting people to take part in research? Add them to a study instead. See Shortlisting and screening people from your panel.
Who can use this
Organisation admins. Other team members can’t send broadcasts.
1. Create a broadcast
Open your panel, click Broadcasts in the sidebar, then click New broadcast.
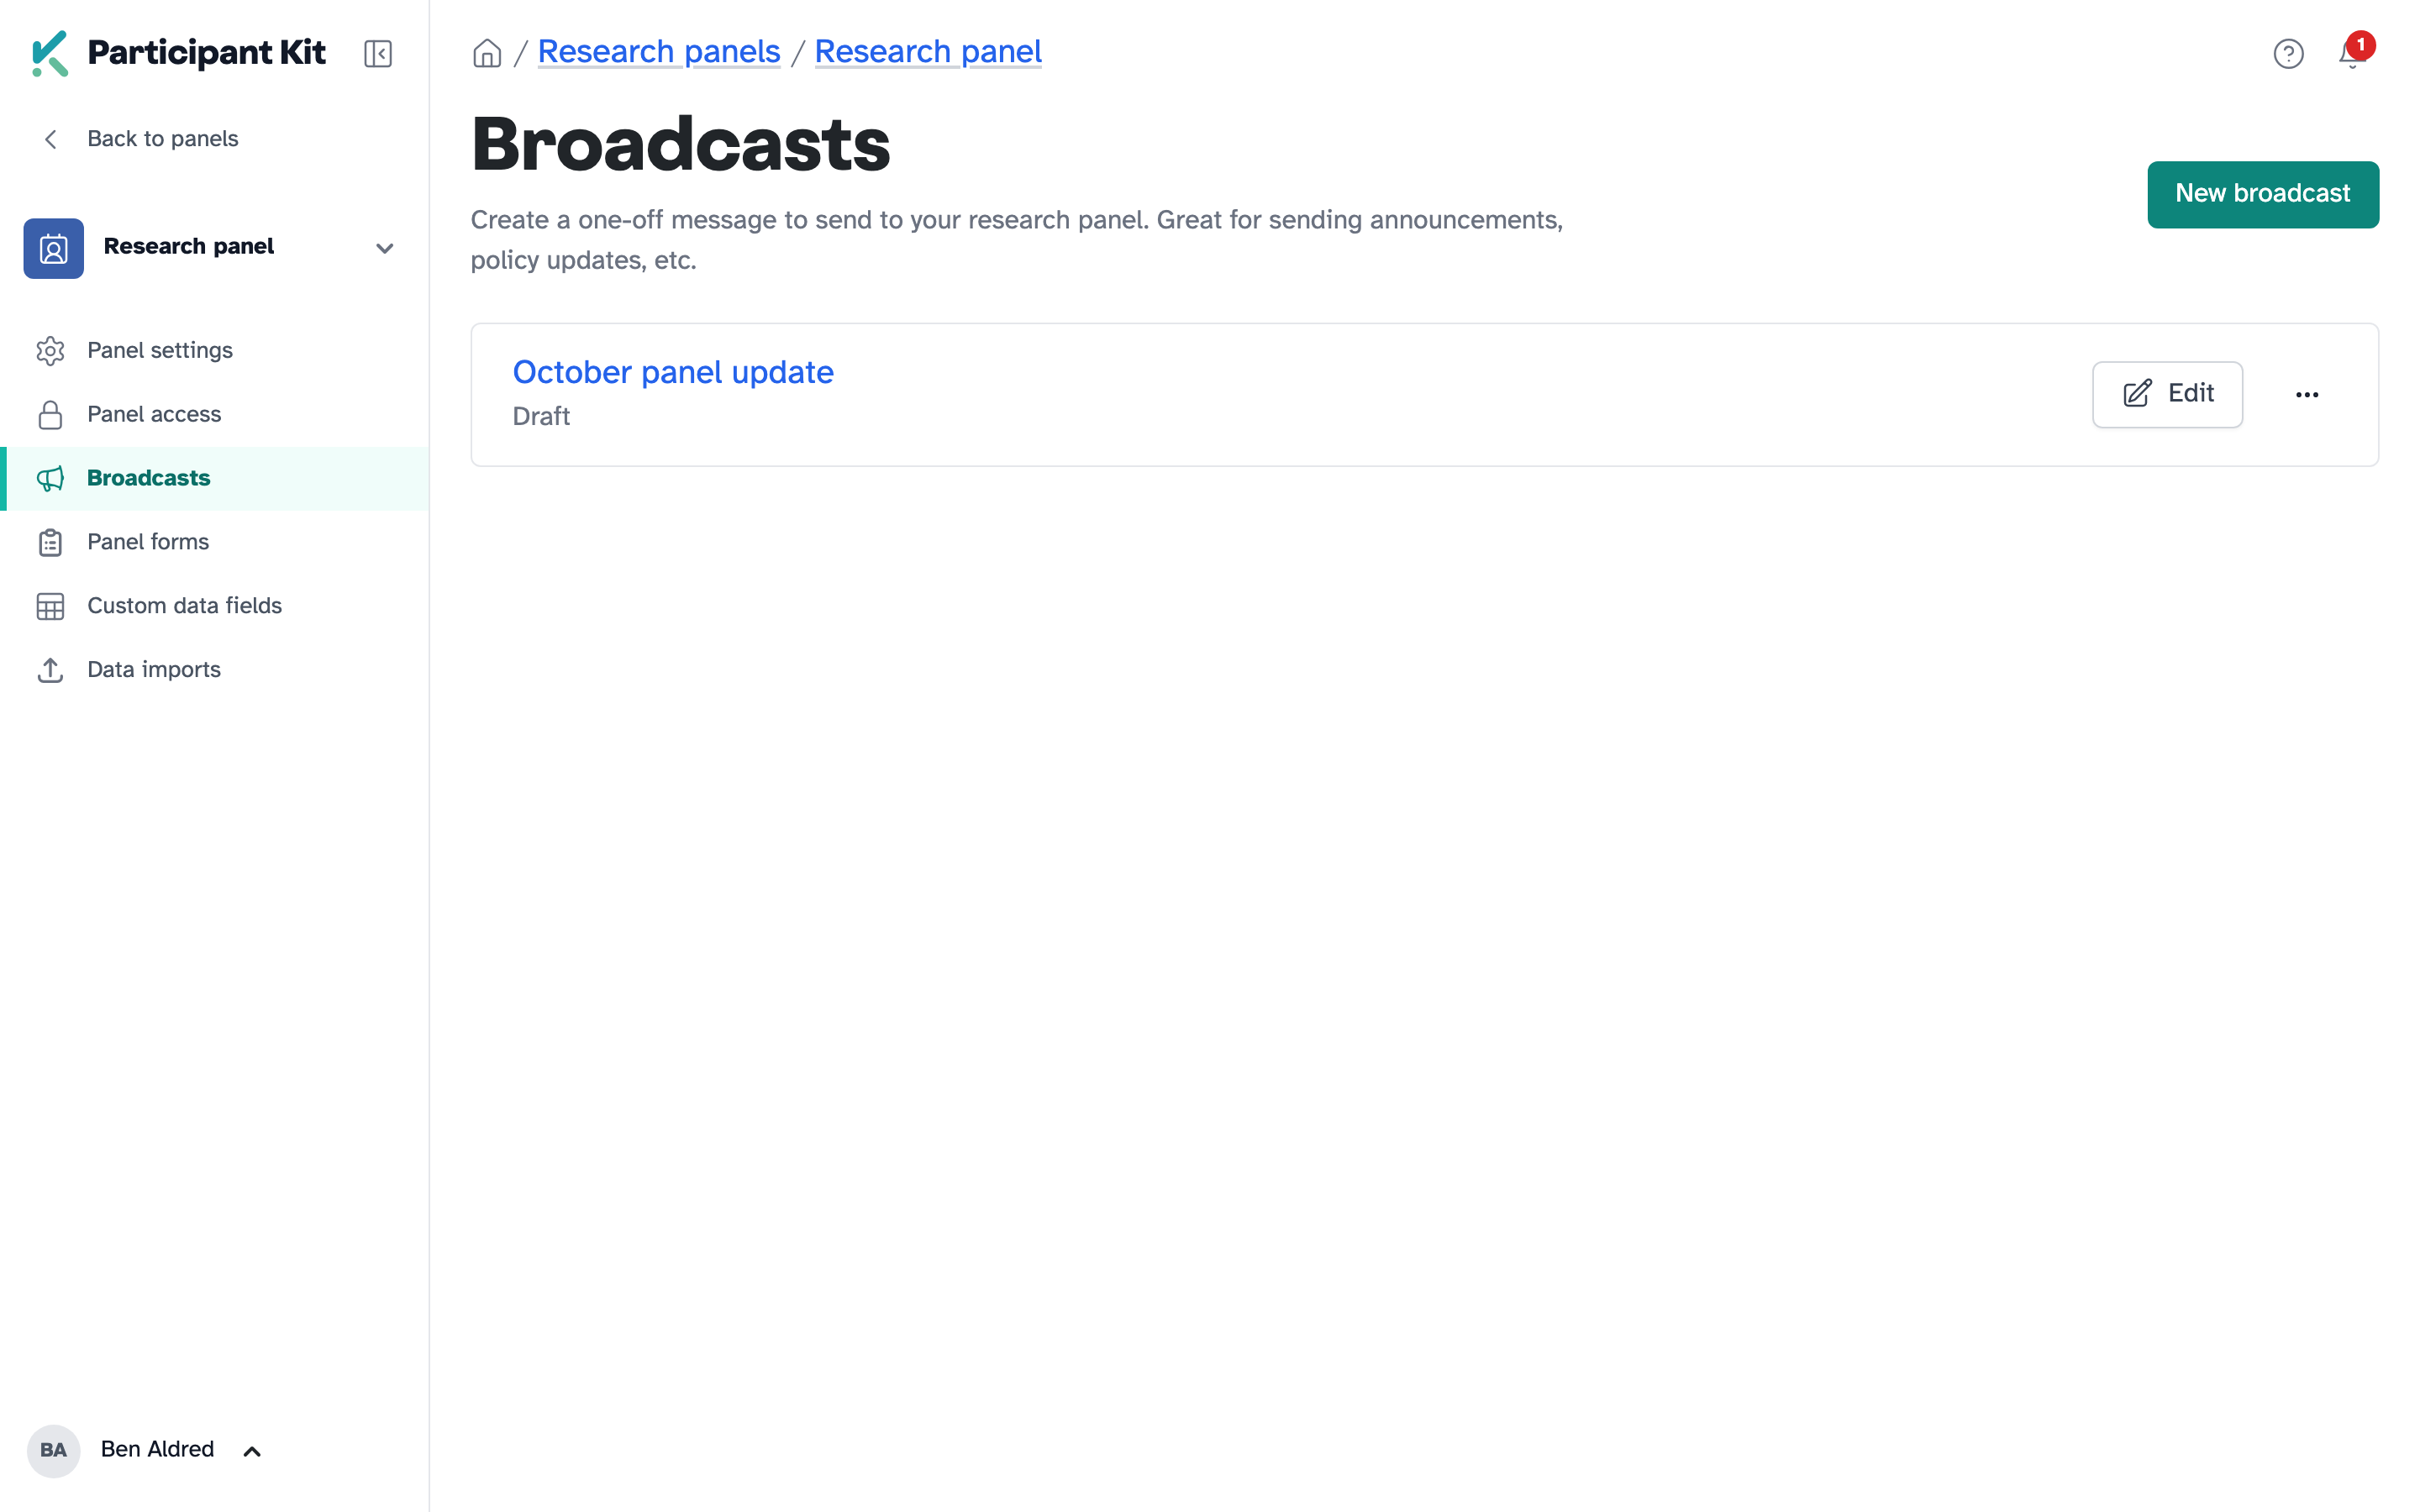
Your broadcast starts as a draft called “Untitled”. It saves as you type, so you can click Finish later and come back to it.
2. Choose who gets it
By default, Send to says Send emails to all panel members, with the number of recipients next to it.
To send to a group, click Filter and build a filter the same way you would on your panel. It changes to Send emails to custom segment, and the number updates. Click the number to open those people in your panel and check who’s included.
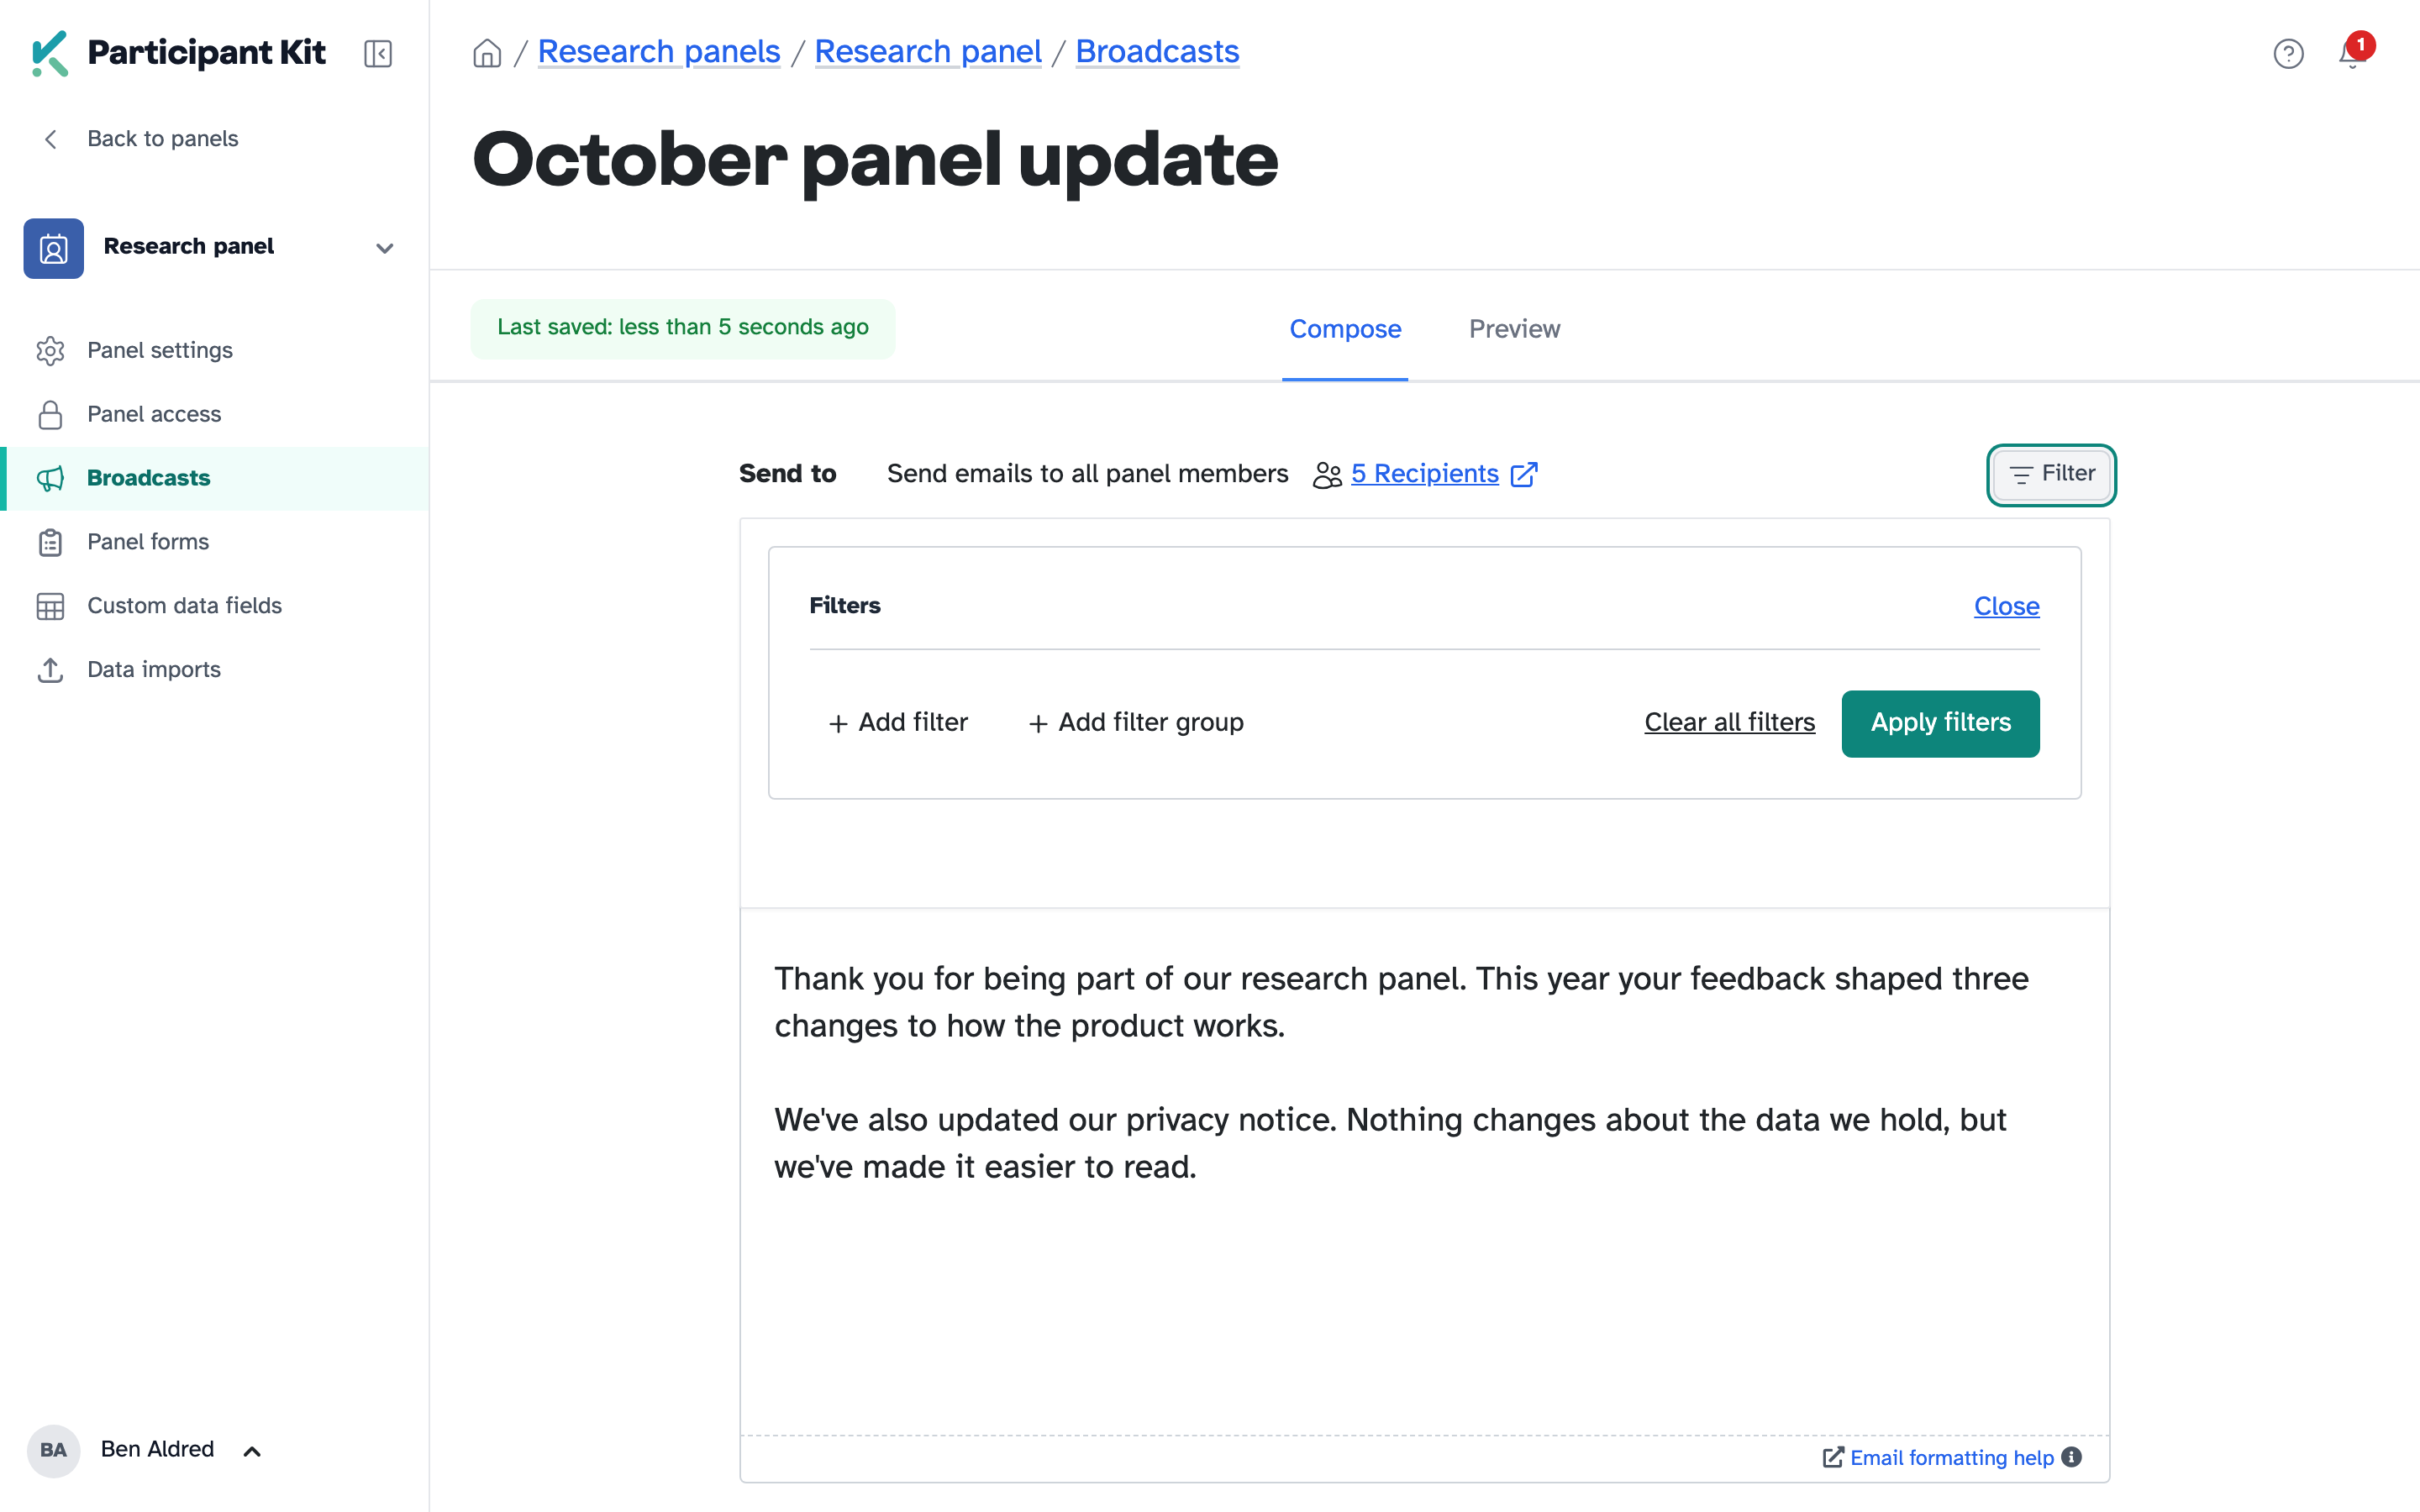
Some people are always left out, whatever your filter:
- anyone who has left the panel
- anyone whose email address has been deactivated, for example because it bounced
- anyone on your do not contact list
3. Write your message
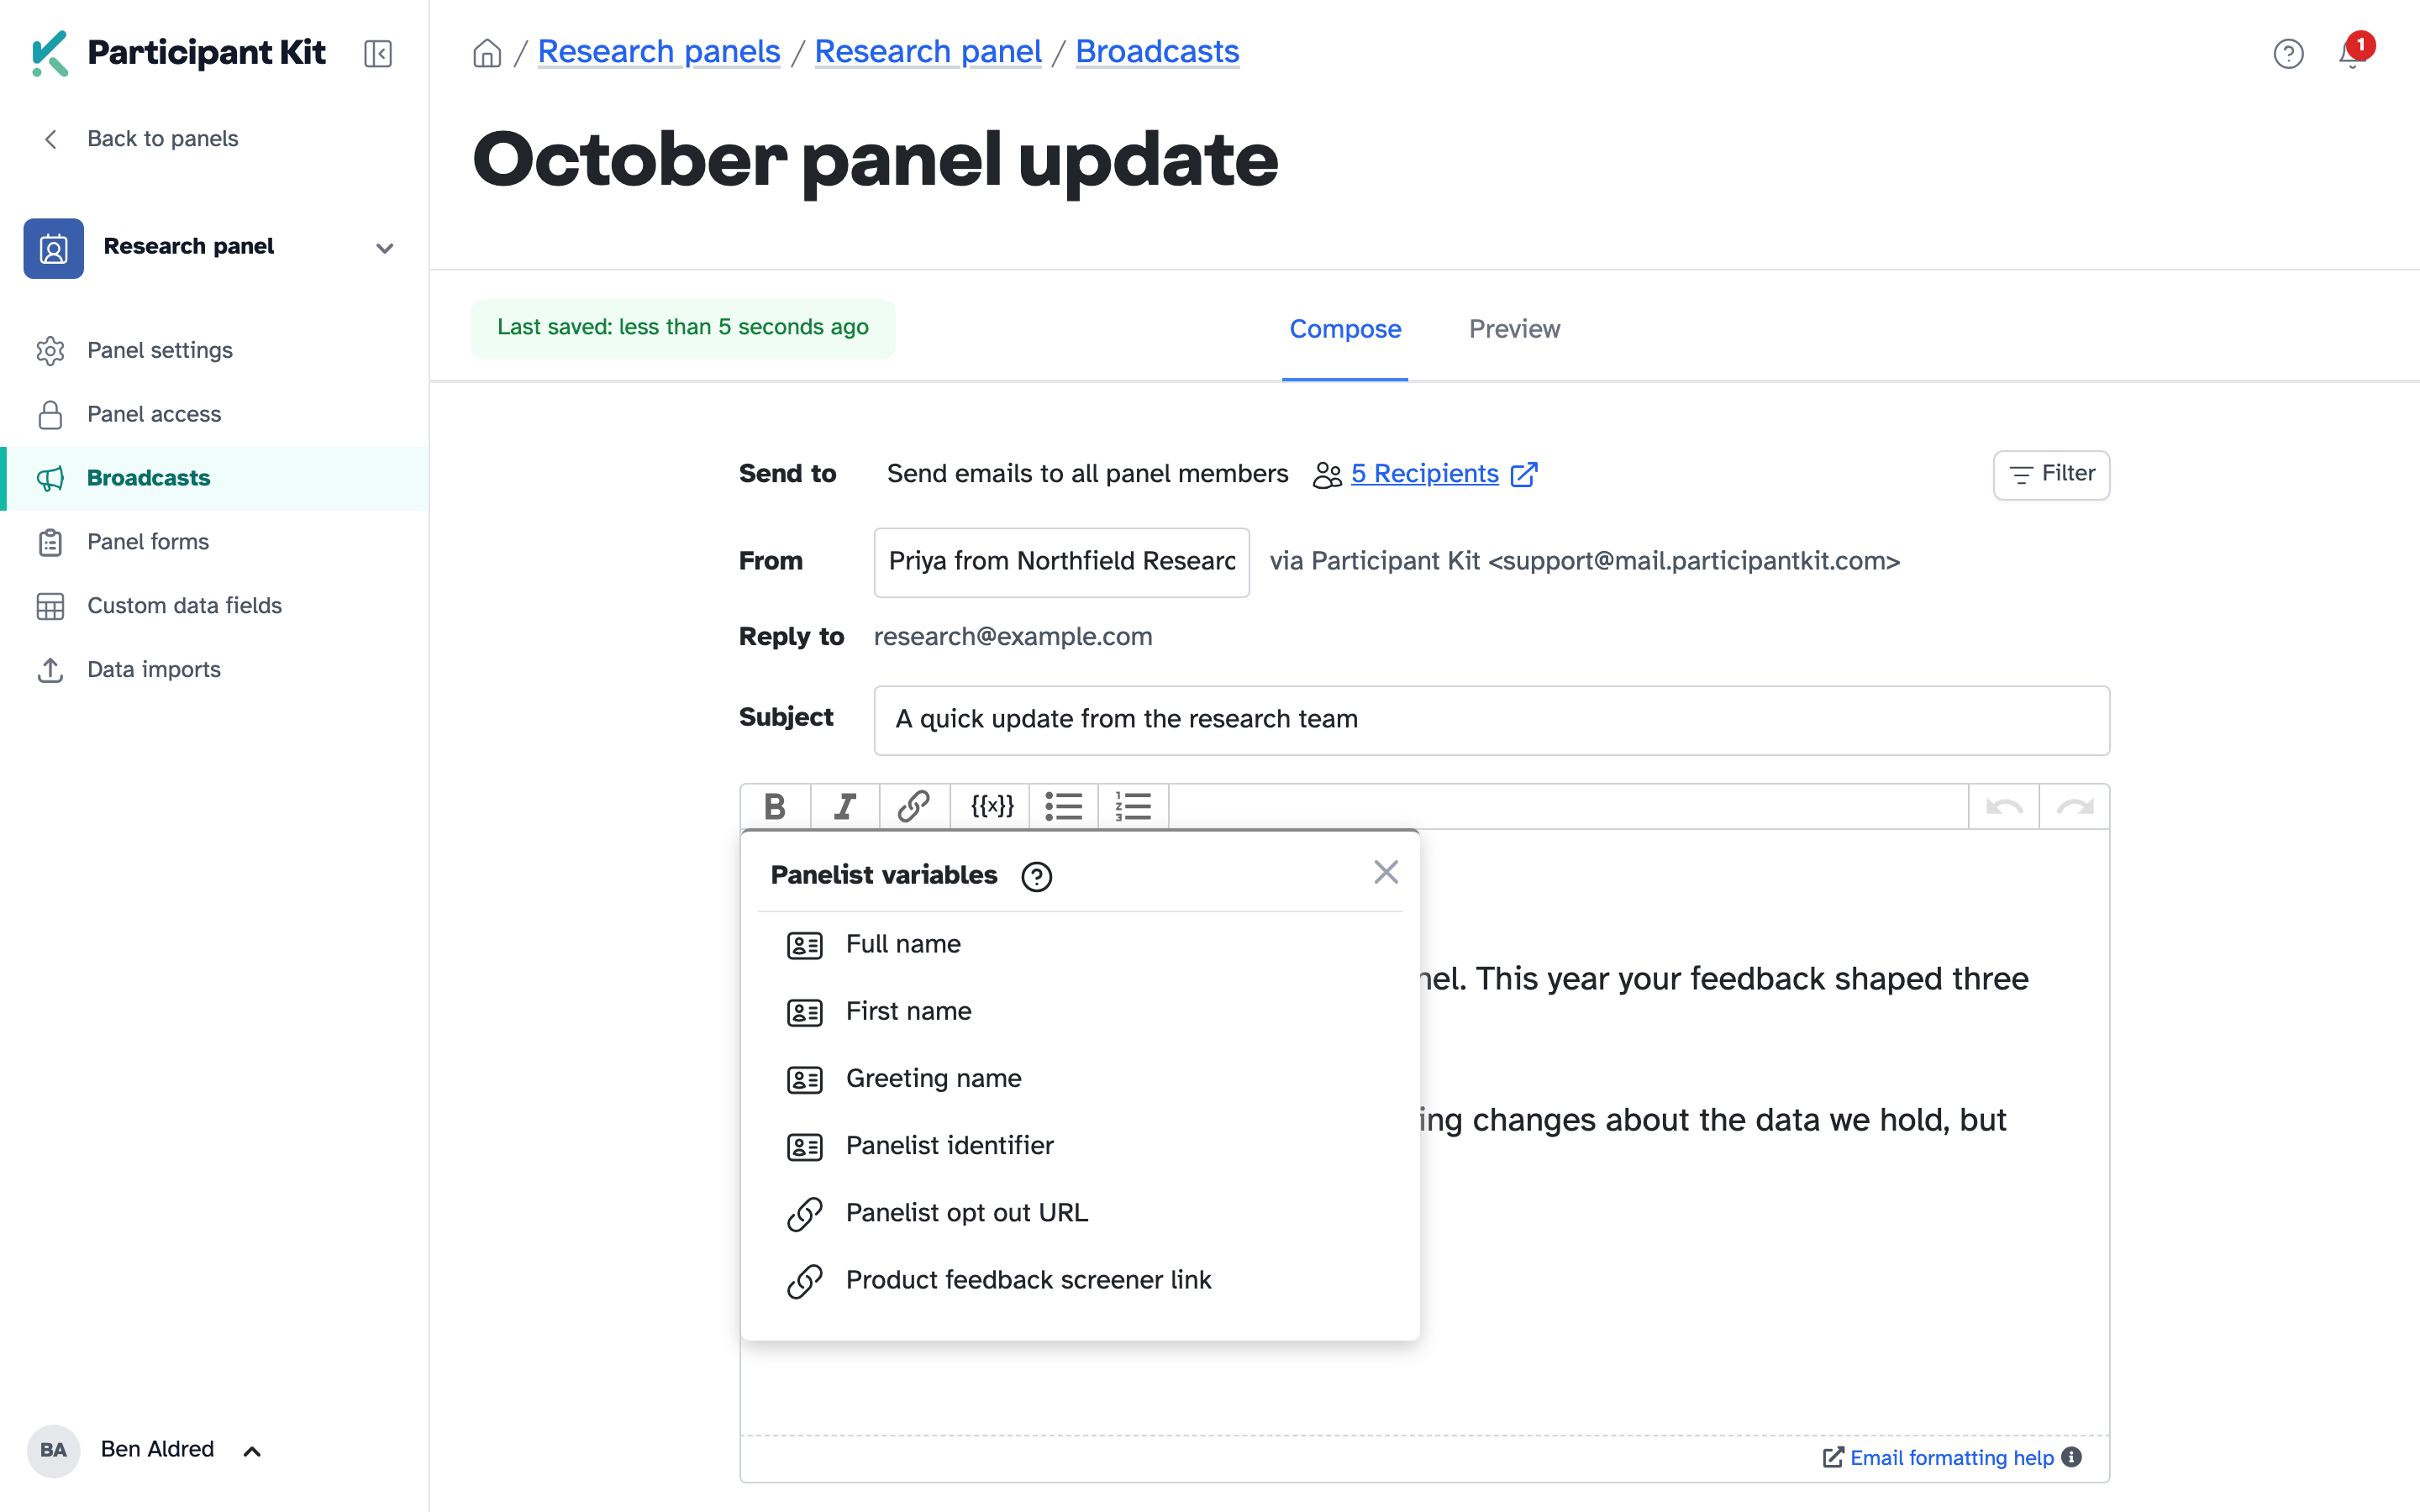
Add a Subject and write your message. From shows the name people will see, and you can change it.
To personalise it, click the {{x}} button in the toolbar. Panelist variables lists what you can add, including:
- First name
- Full name
- Greeting name: the name they asked to be called. If they didn’t give one, it uses their first name, or the first word of their full name
If your panel has an open screener, it’s listed here too. Each person gets their own link, so their answers are saved to their record.
4. Preview and test
Click Preview to see the email as it will arrive. Use Preview as to switch between recipients.
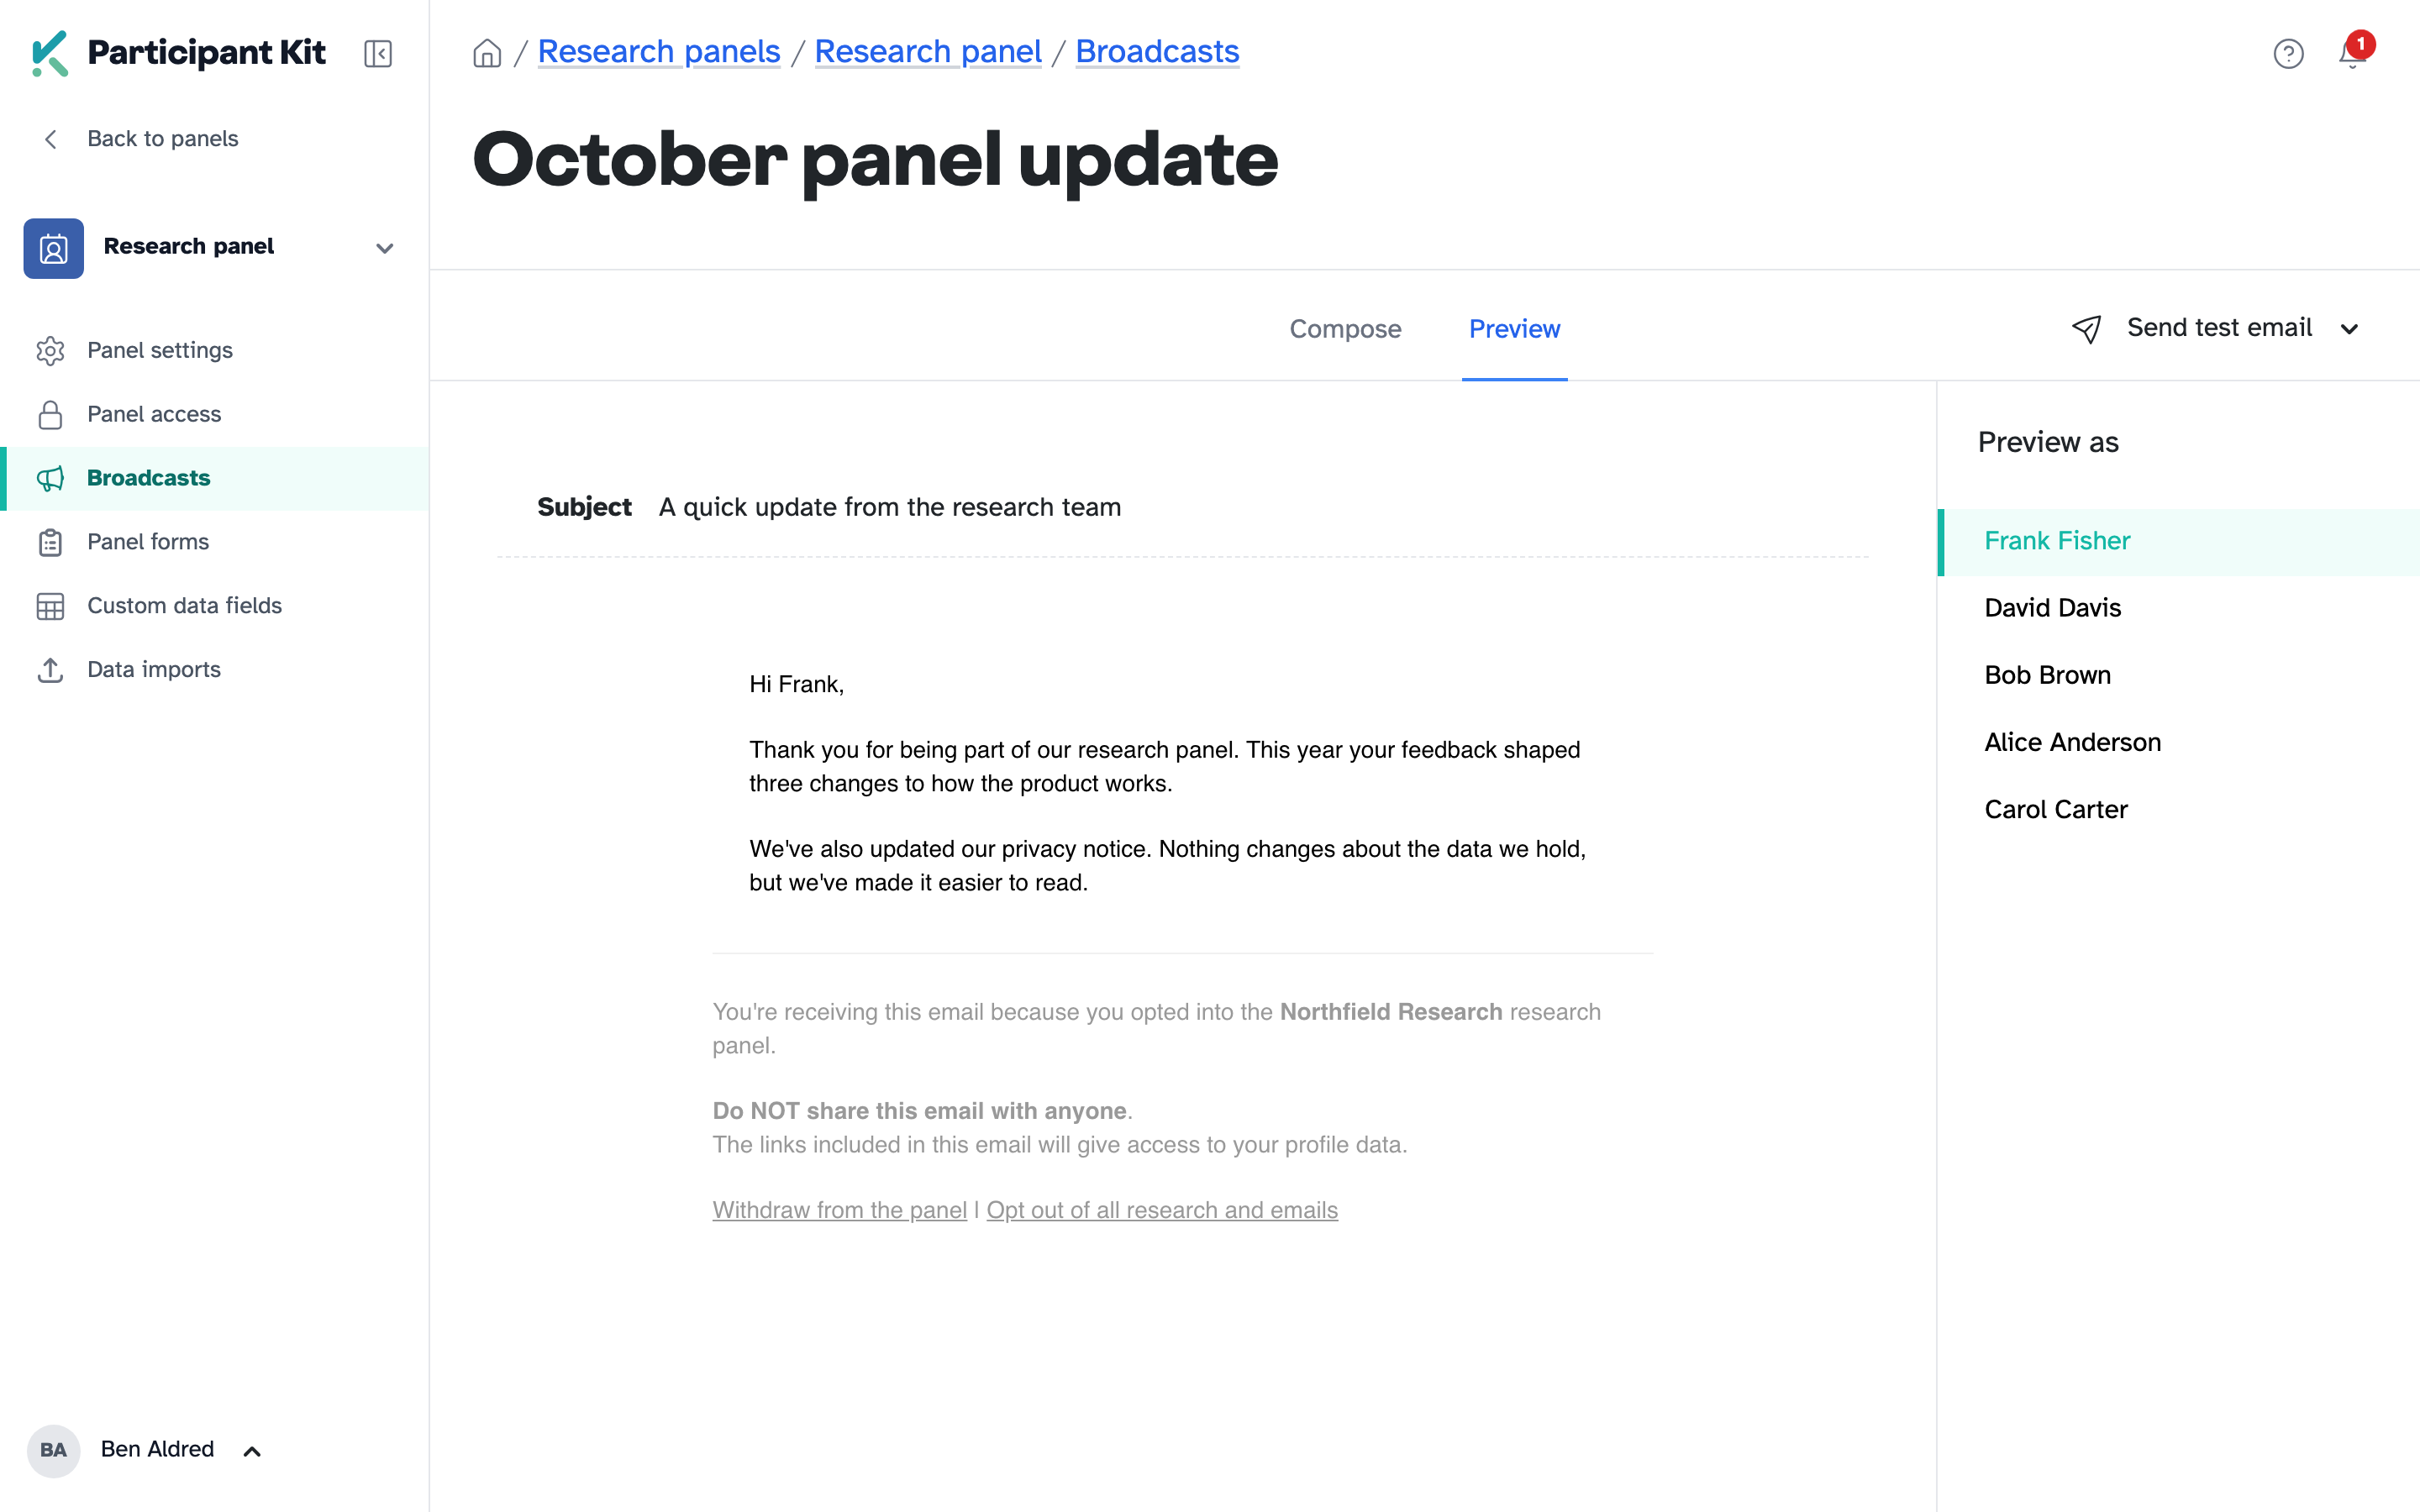
If a variable is typed wrongly, like a missing bracket, the preview shows an error. A variable that doesn’t exist shows up blank instead, so check names in the preview.
Click Send test email to send a copy to yourself. The test uses placeholder text instead of a real person’s details. Use Preview to check names, and the test to see how it looks in your inbox.
The preview includes the footer that every broadcast gets. It tells people why they’re getting the email, with links to Withdraw from the panel or Opt out of all research and emails. You can’t remove it.
5. Send it
Go back to Compose and click Schedule for sending…
Check the number of recipients, then click Send now. Sending starts straight away. You can’t choose a later time.
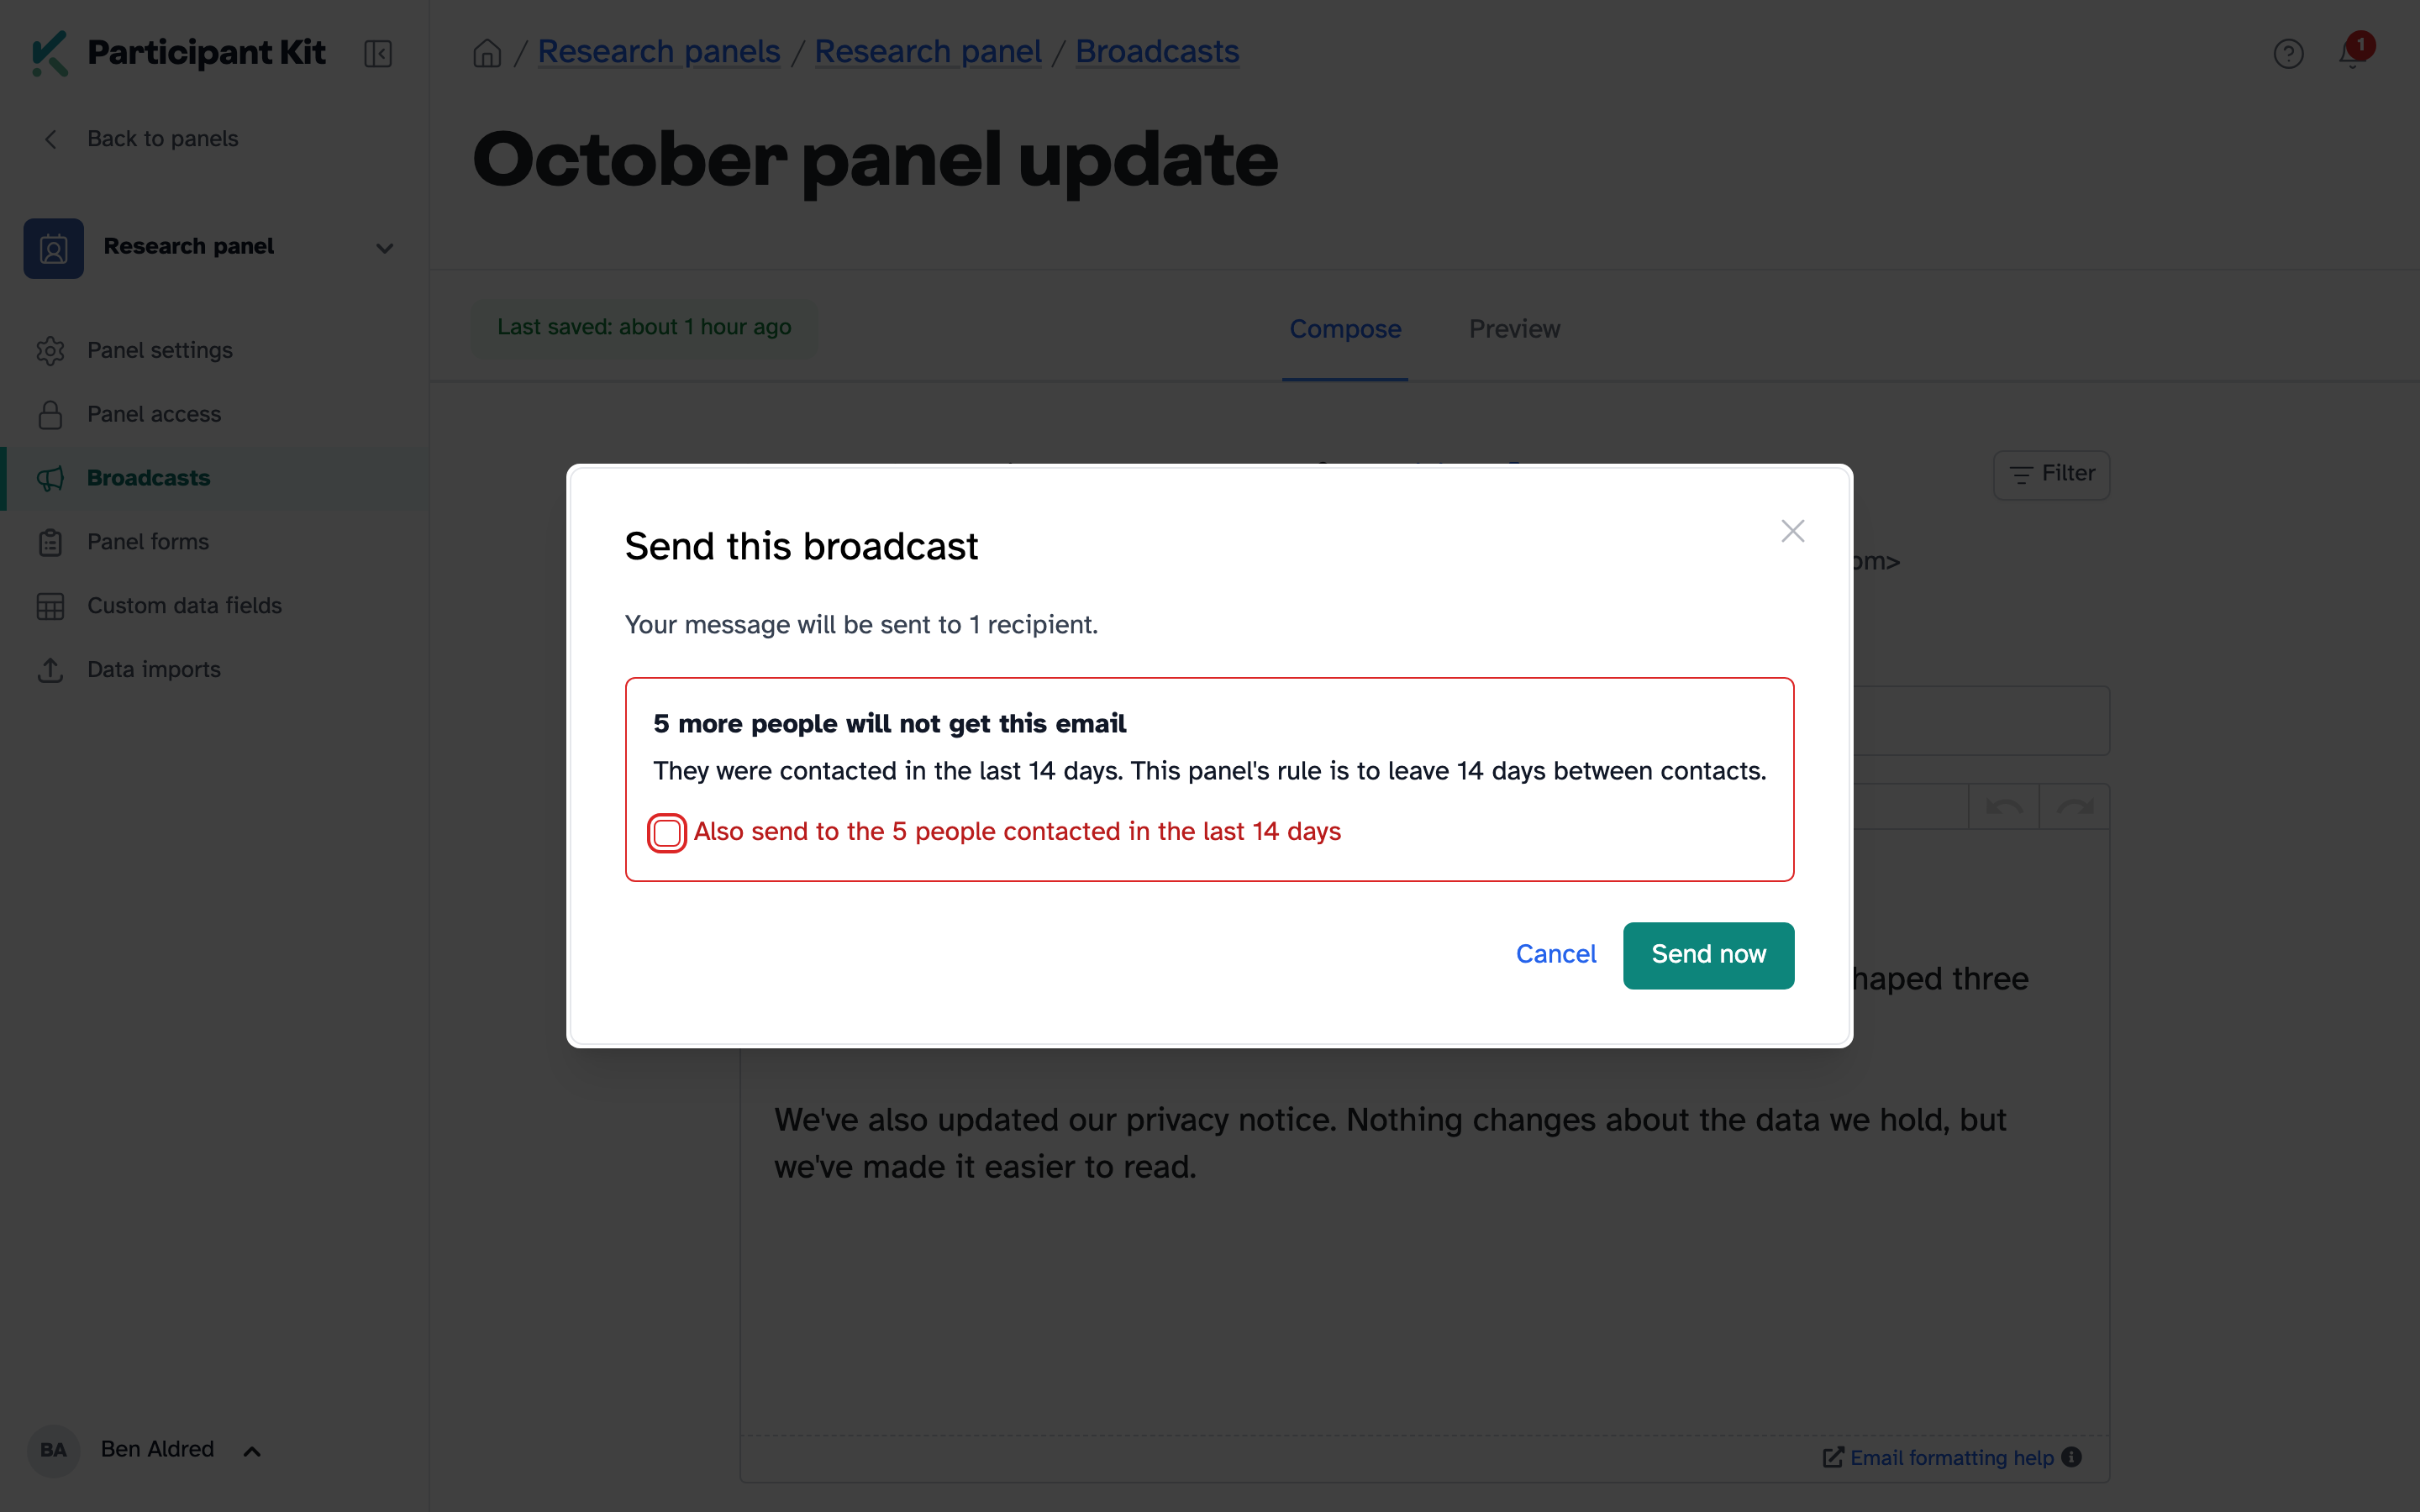
If anyone was contacted recently, your panel rules leave them out and the confirmation tells you how many. As an organisation admin, you can override this. Tick the box in the confirmation to send to them anyway.
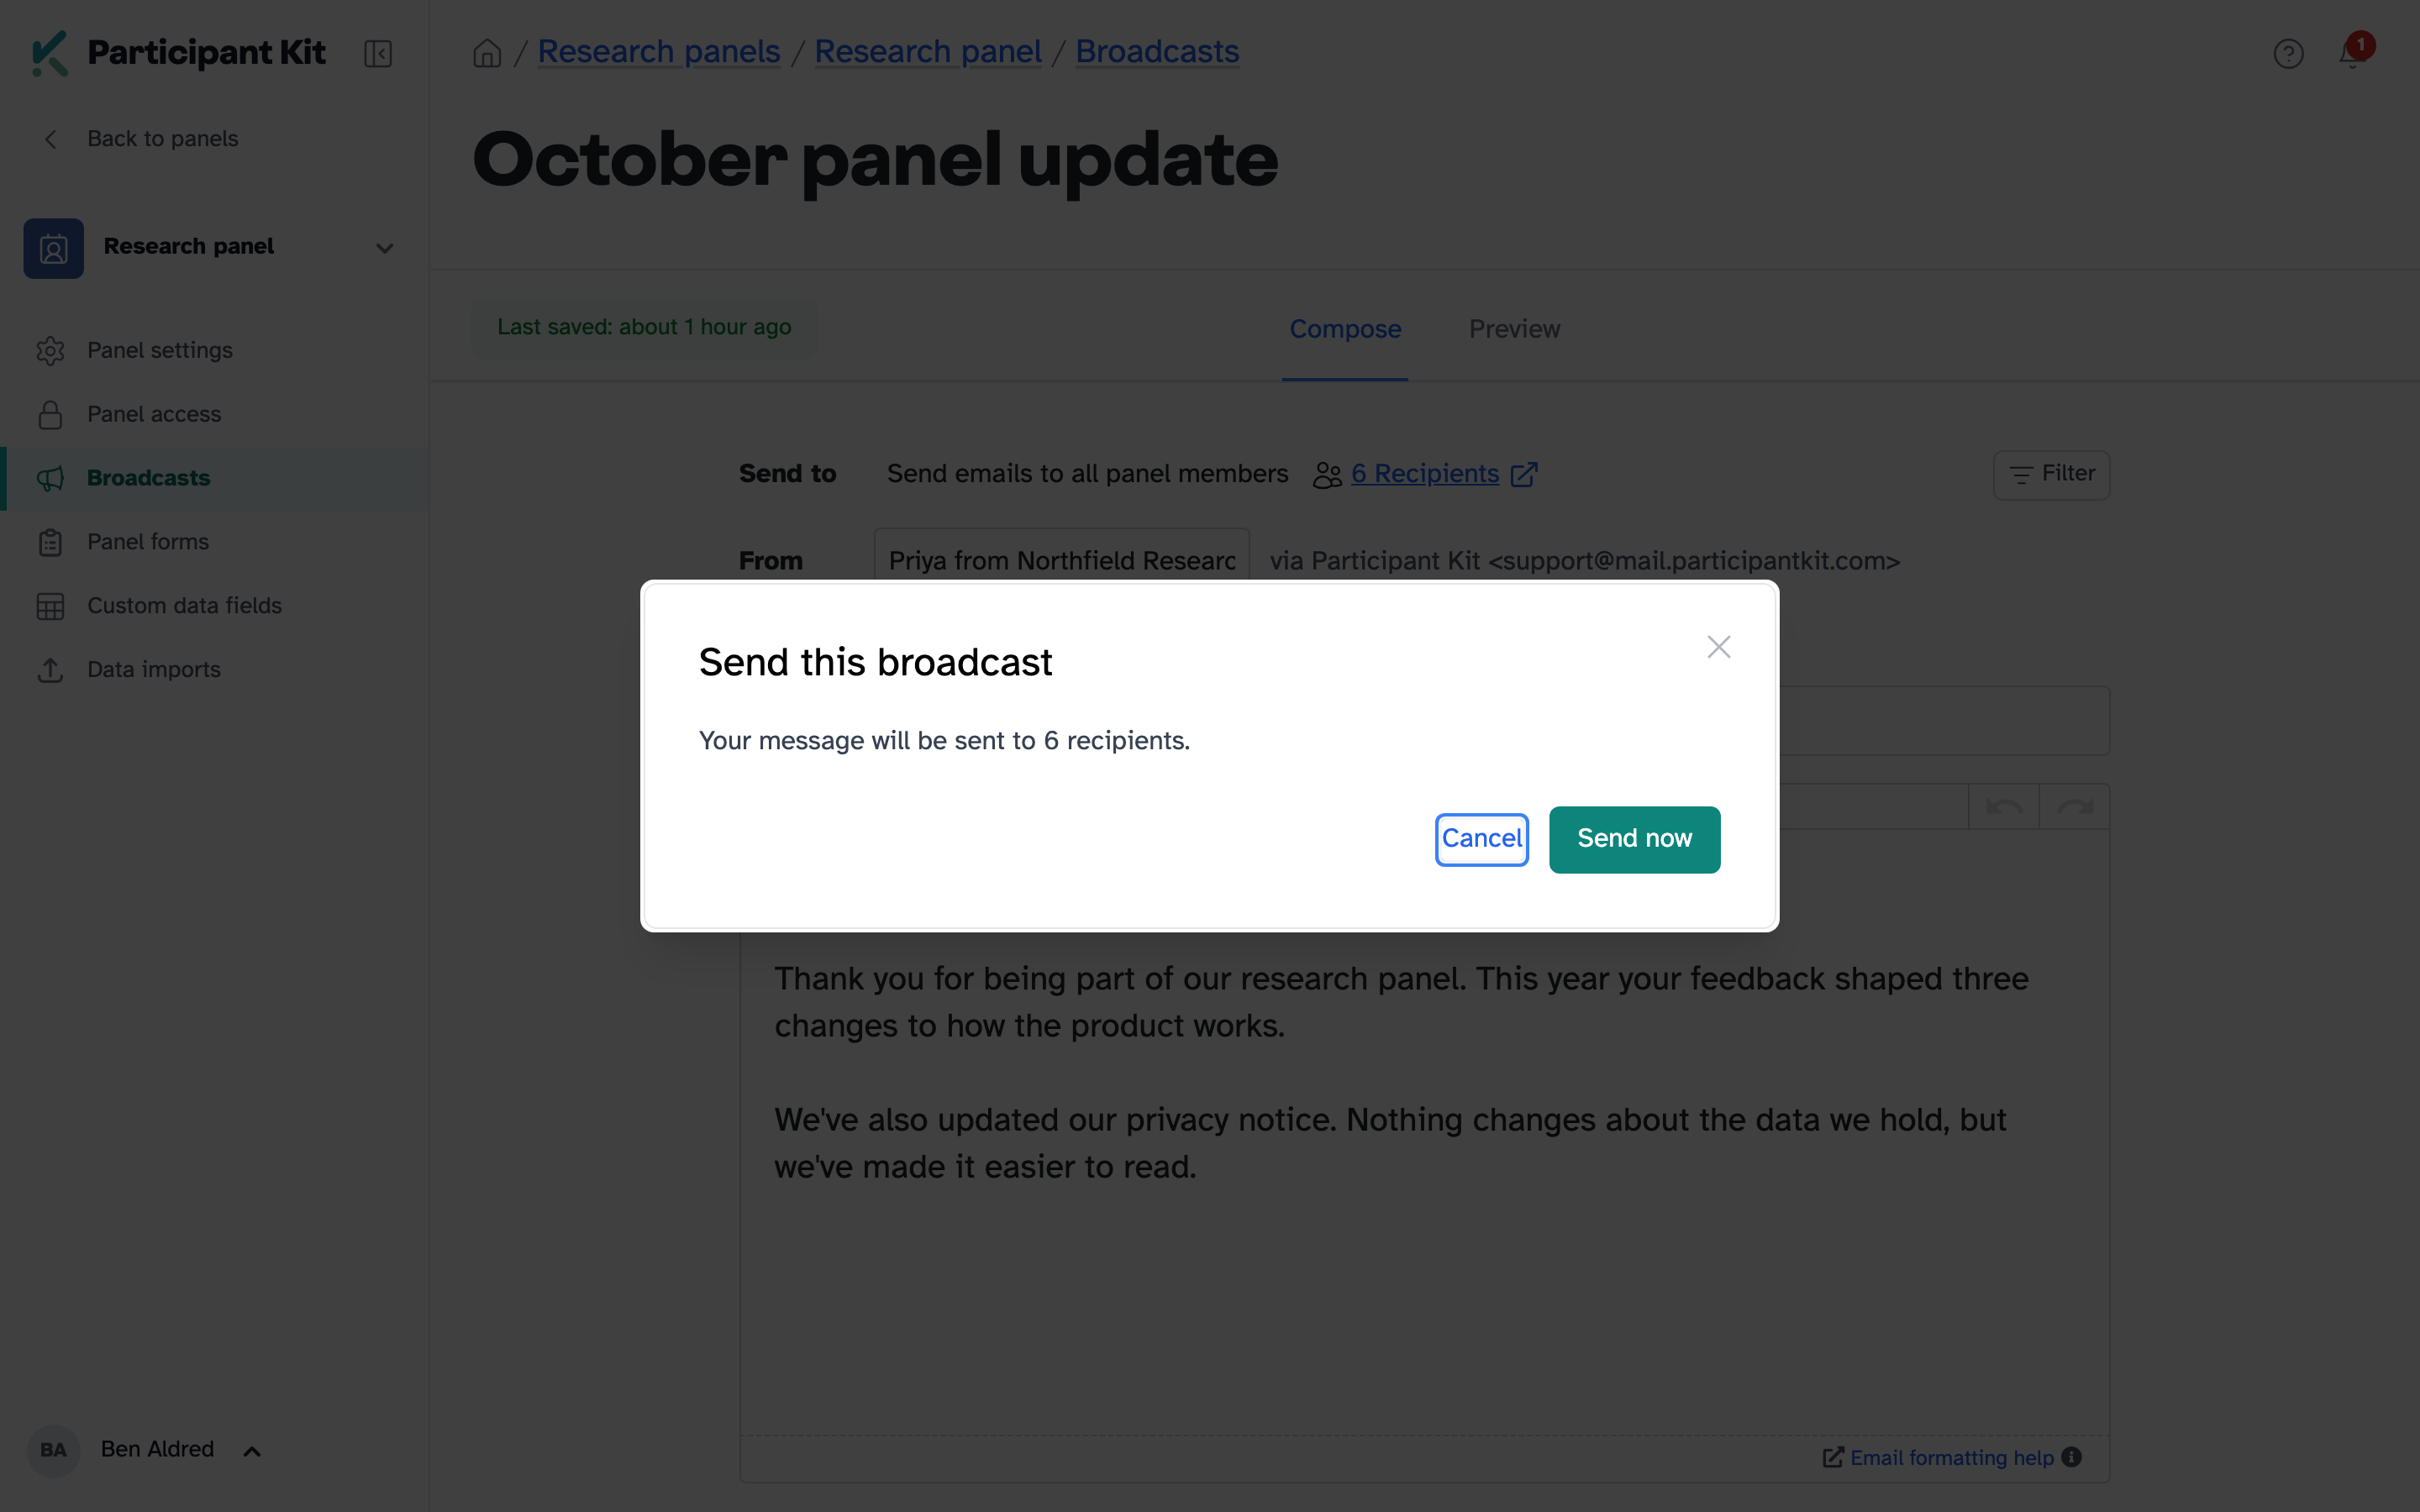
Larger broadcasts are sent in batches over time, which helps them avoid spam filters. If yours will be batched, the confirmation tells you how long sending will take.
New accounts have a daily sending limit while we check that sending is responsible. If a broadcast reaches it, sending pauses and carries on the next day. Only one broadcast can send at a time.
Follow up with people who didn’t get it
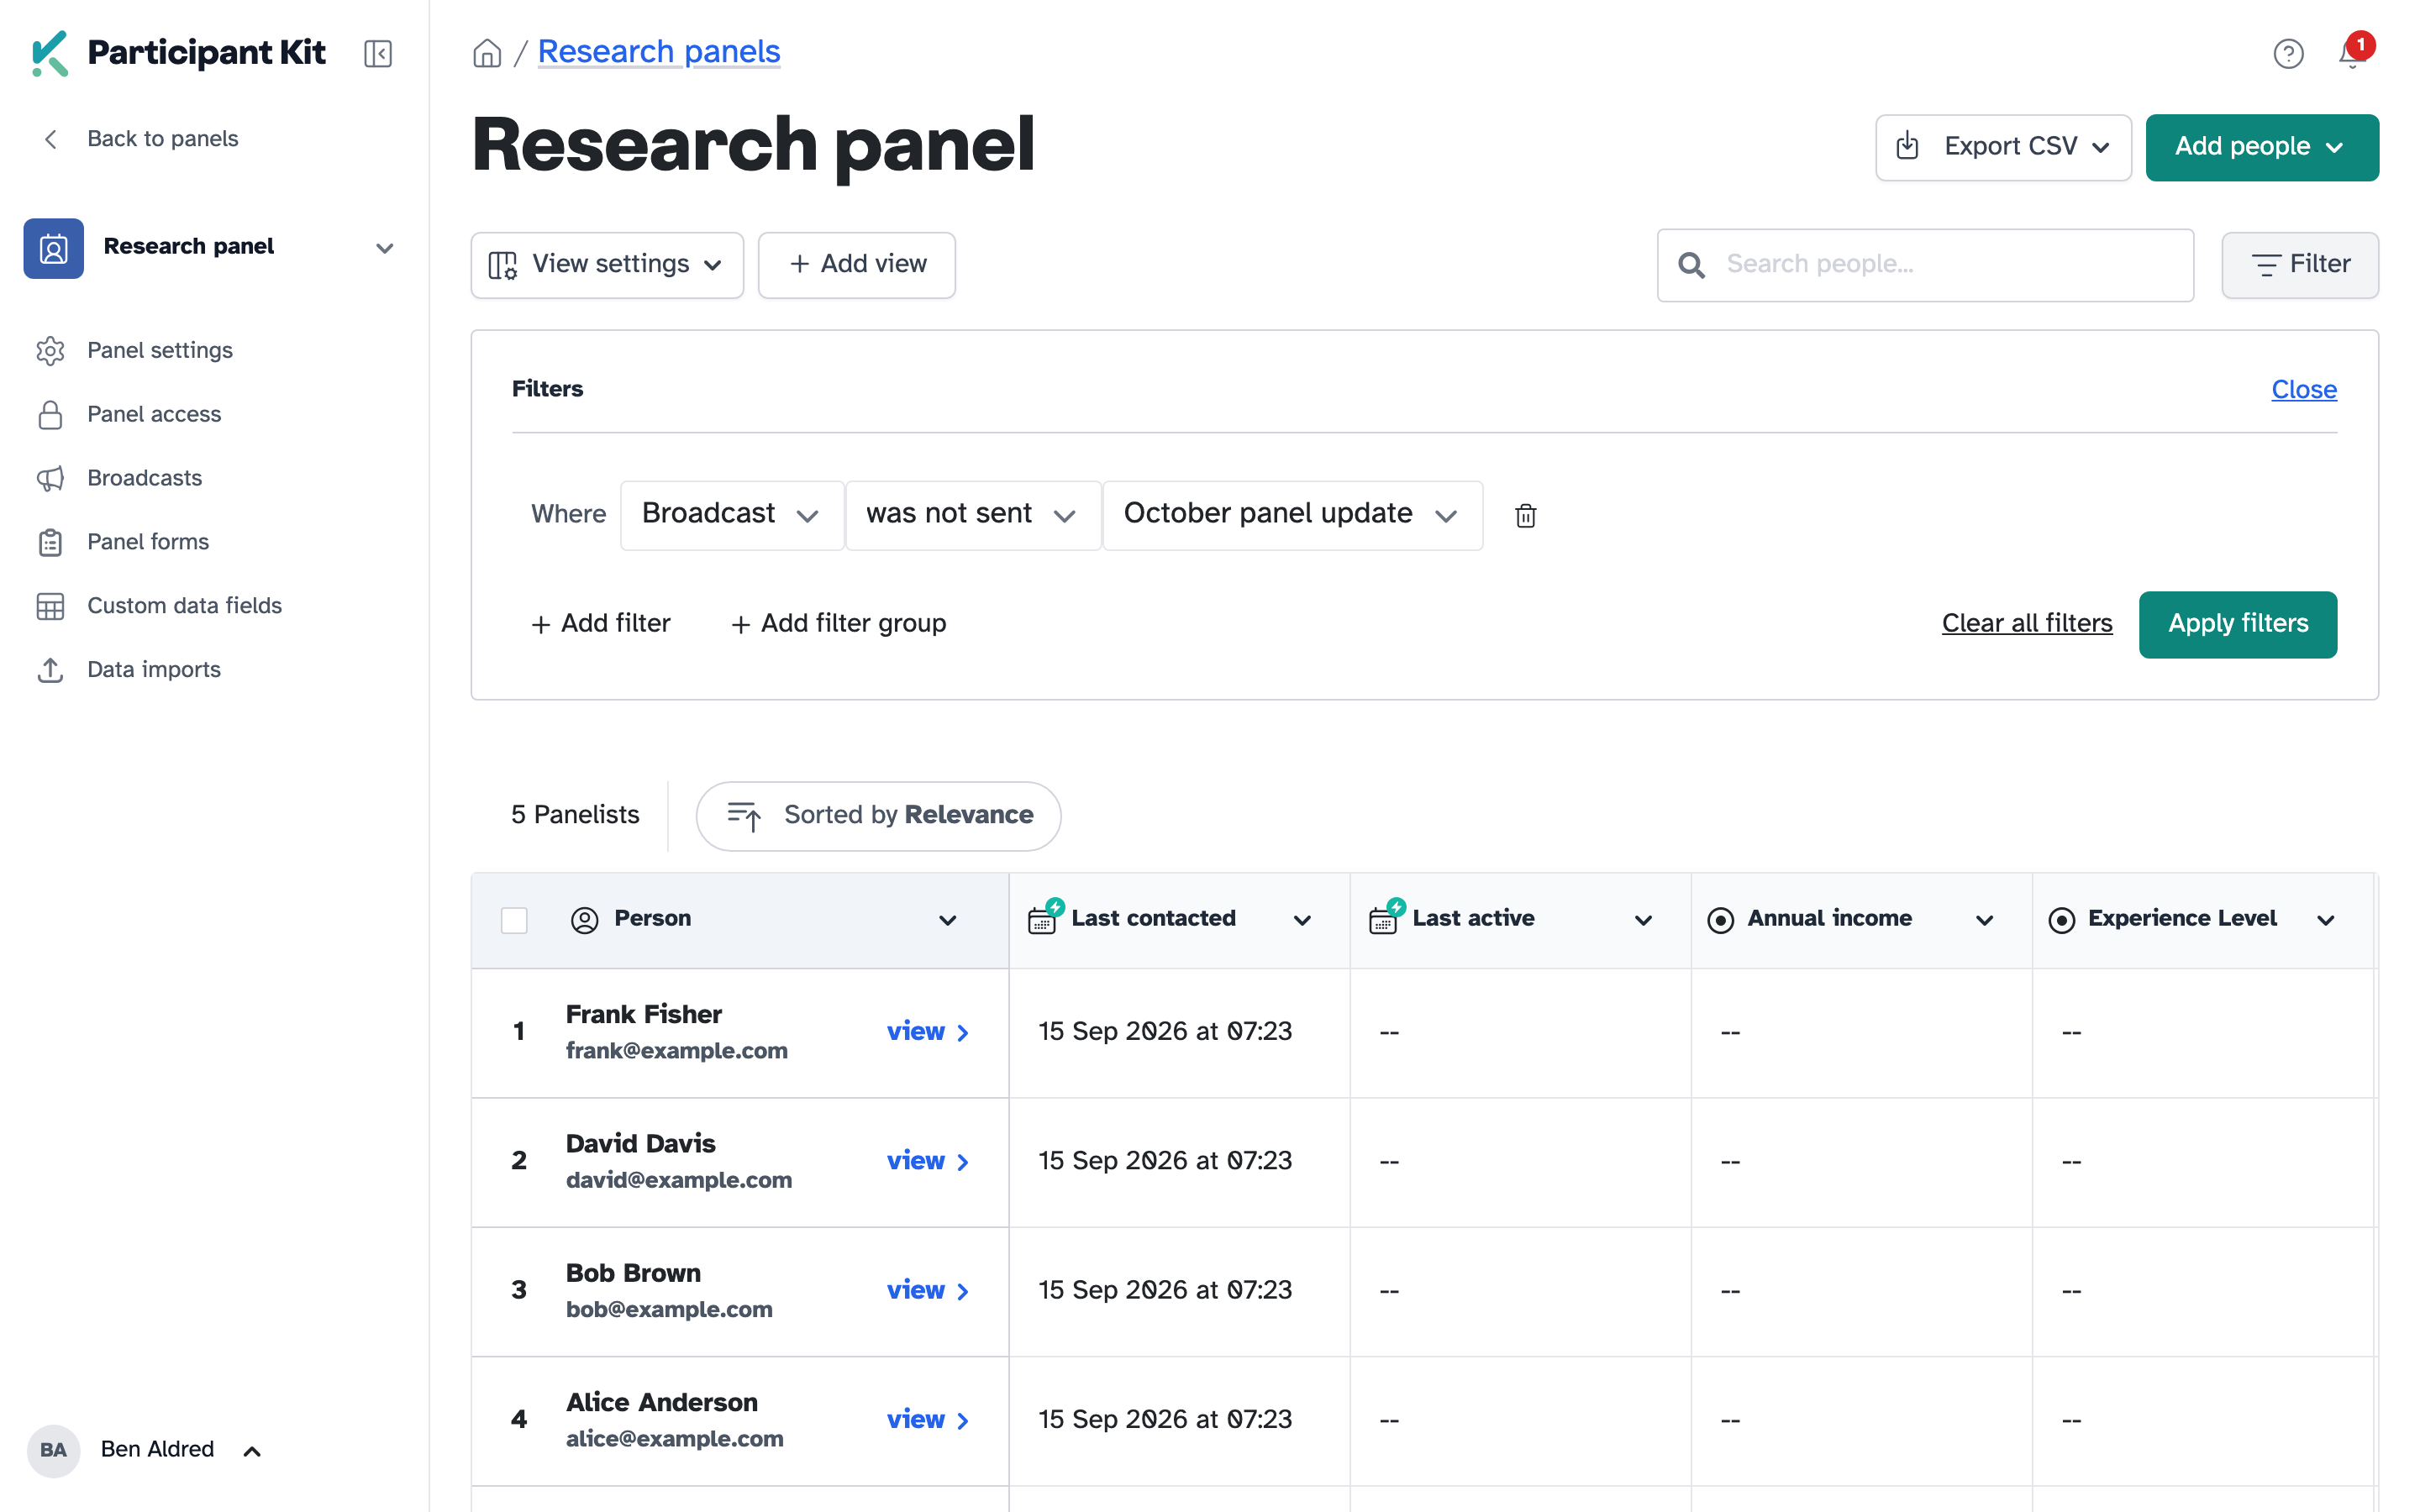
Open your panel, click Filter and choose Broadcast, then was not sent. A broadcast only appears here once it has started sending. You can use the same filter when you choose who gets your next broadcast.
Key takeaways
💡 Remember: Once a broadcast has been sent, you can’t edit it.
🧪 Try: Start your message with Greeting name, so people are addressed the way they asked to be.
⚠️ Watch for: A misspelt variable doesn’t show an error. It just comes out blank, so check every name in Preview.
⚡ Quick tip: Use the Broadcast filter to send a follow-up only to the people who missed the first one.