
Sending messages to participants
Use this when you want to email one or more participants in a study. For example, to share the details of their session, send a reminder, or ask them to sign a form.
Each person gets a separate email, sent only to them, so nobody’s email address is shared with anyone else.
To email a whole panel instead, see Sending a broadcast to your panel.
1. Choose who to message
Open the study and go to the Participants tab. Tick the people you want to message, then click Message in the bar above the table.
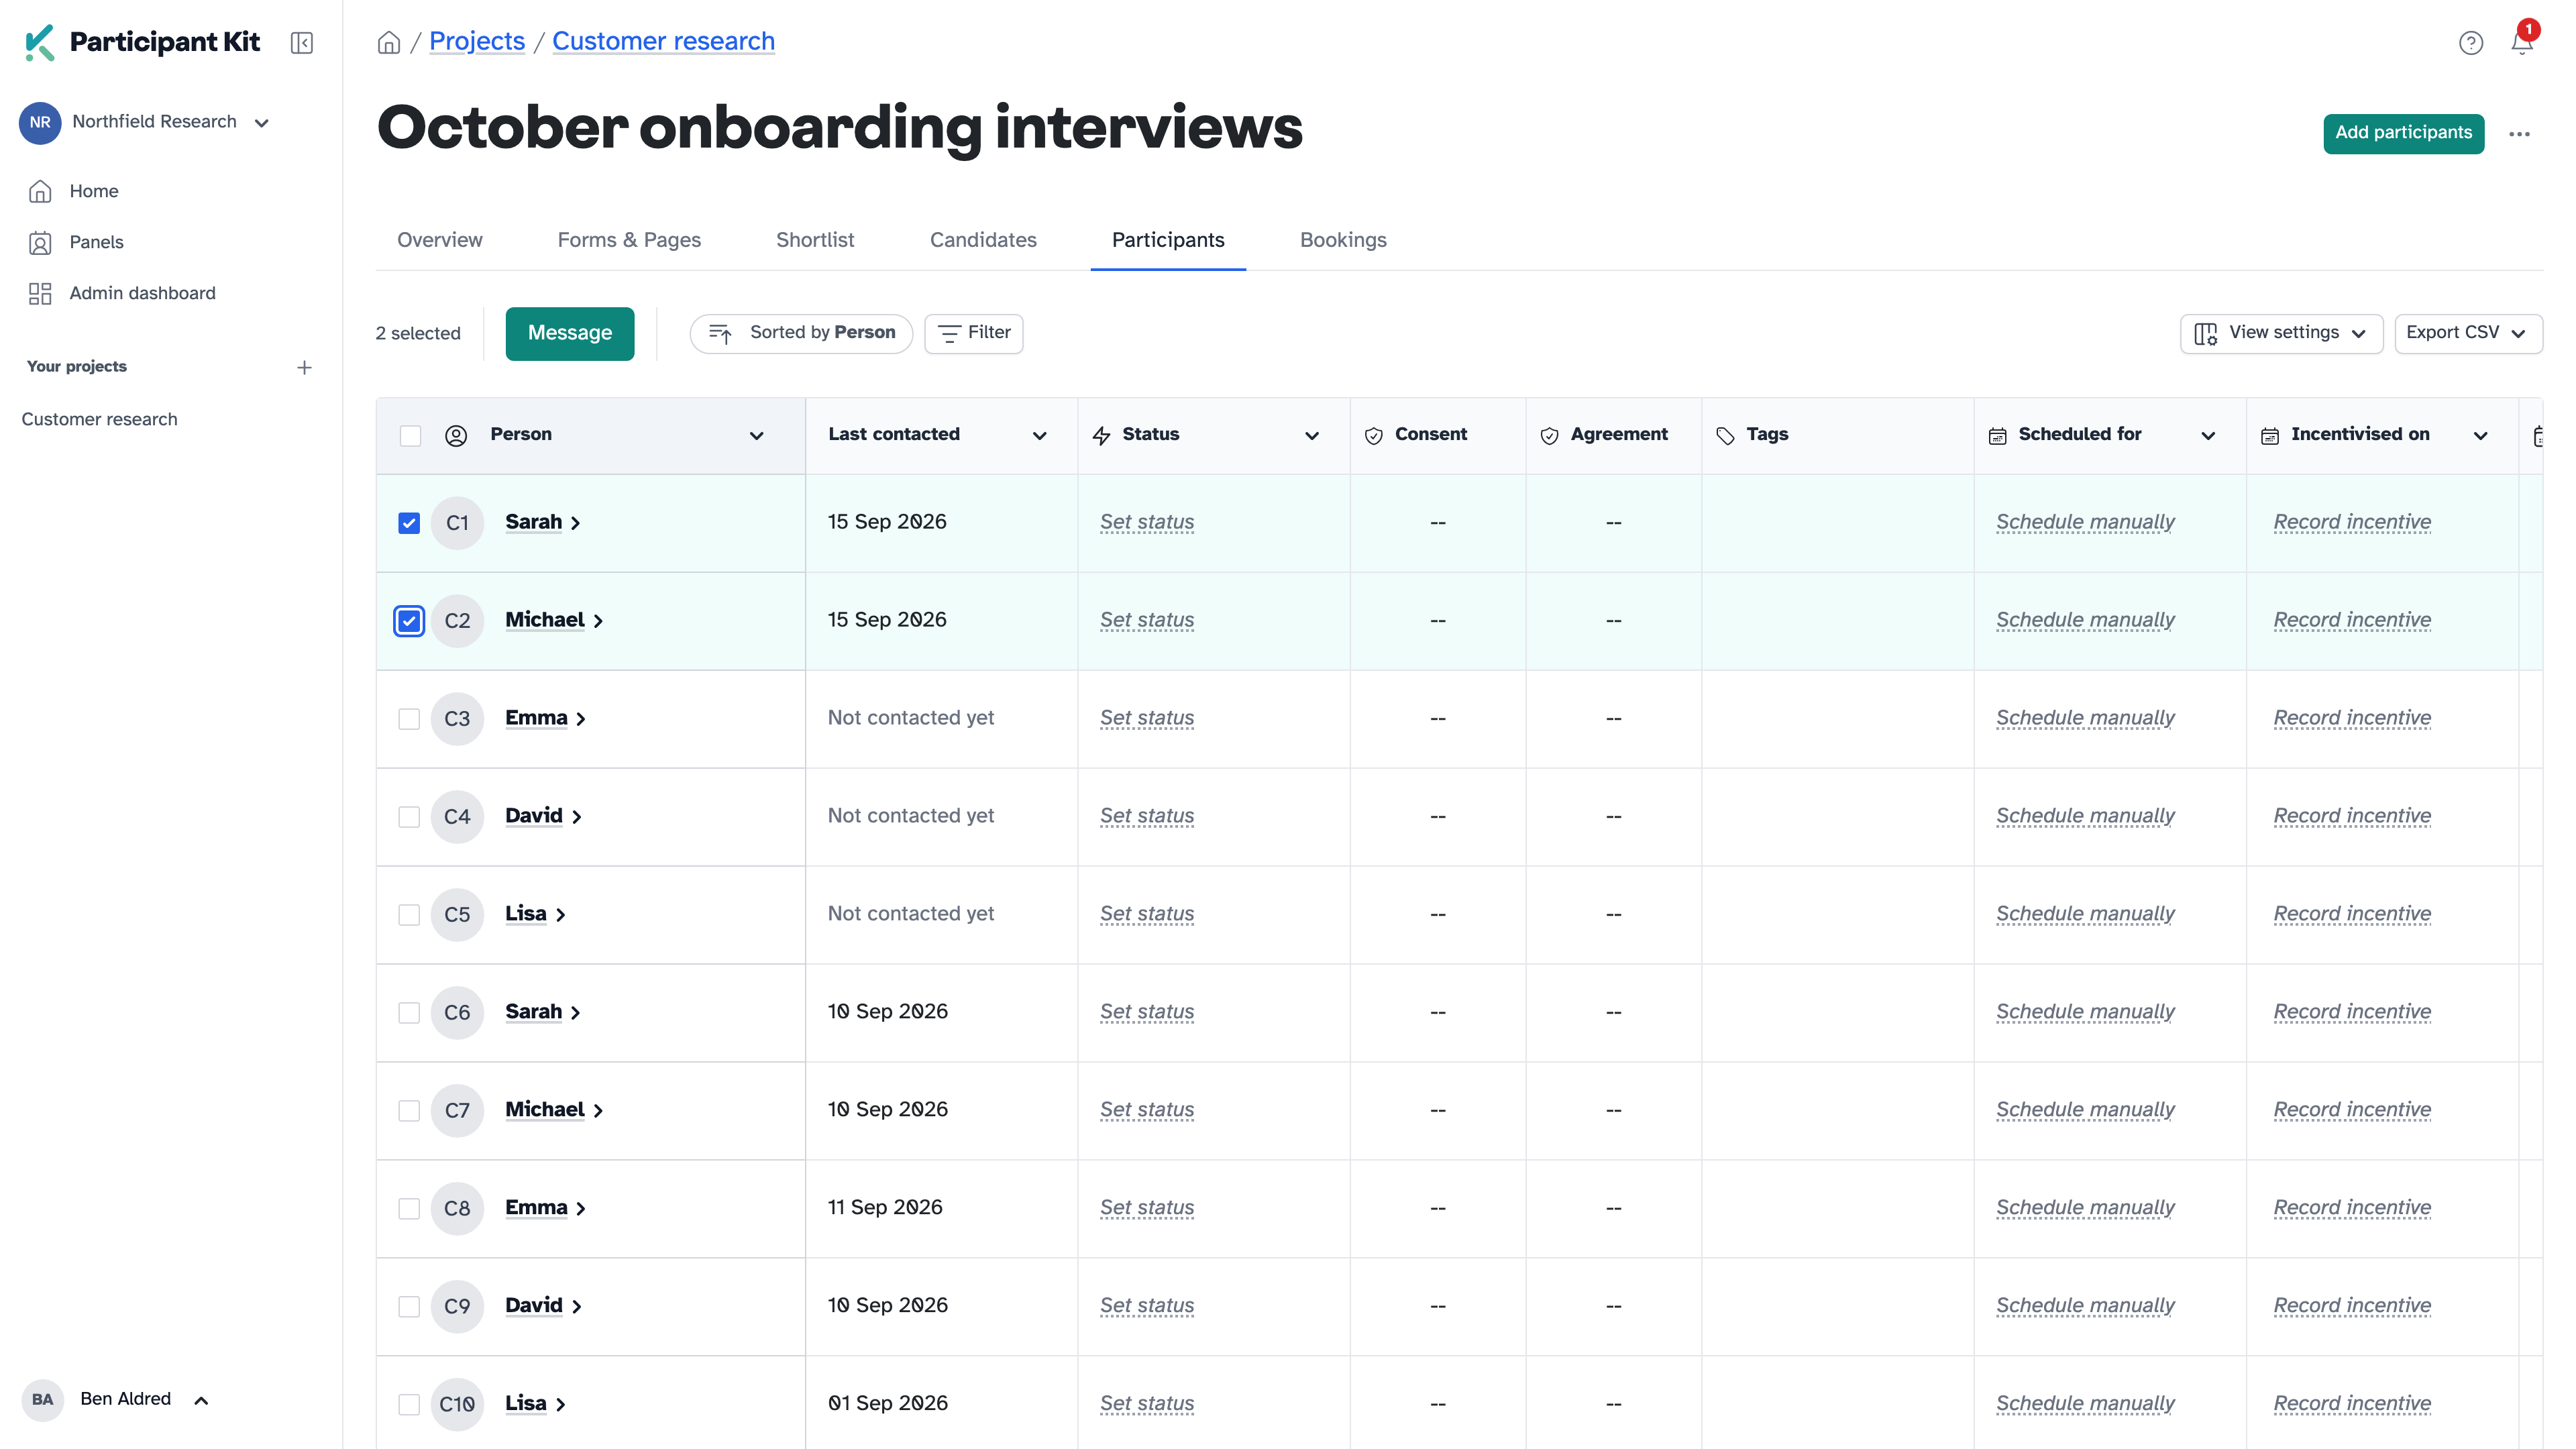
To message one person, open their profile and click Message.
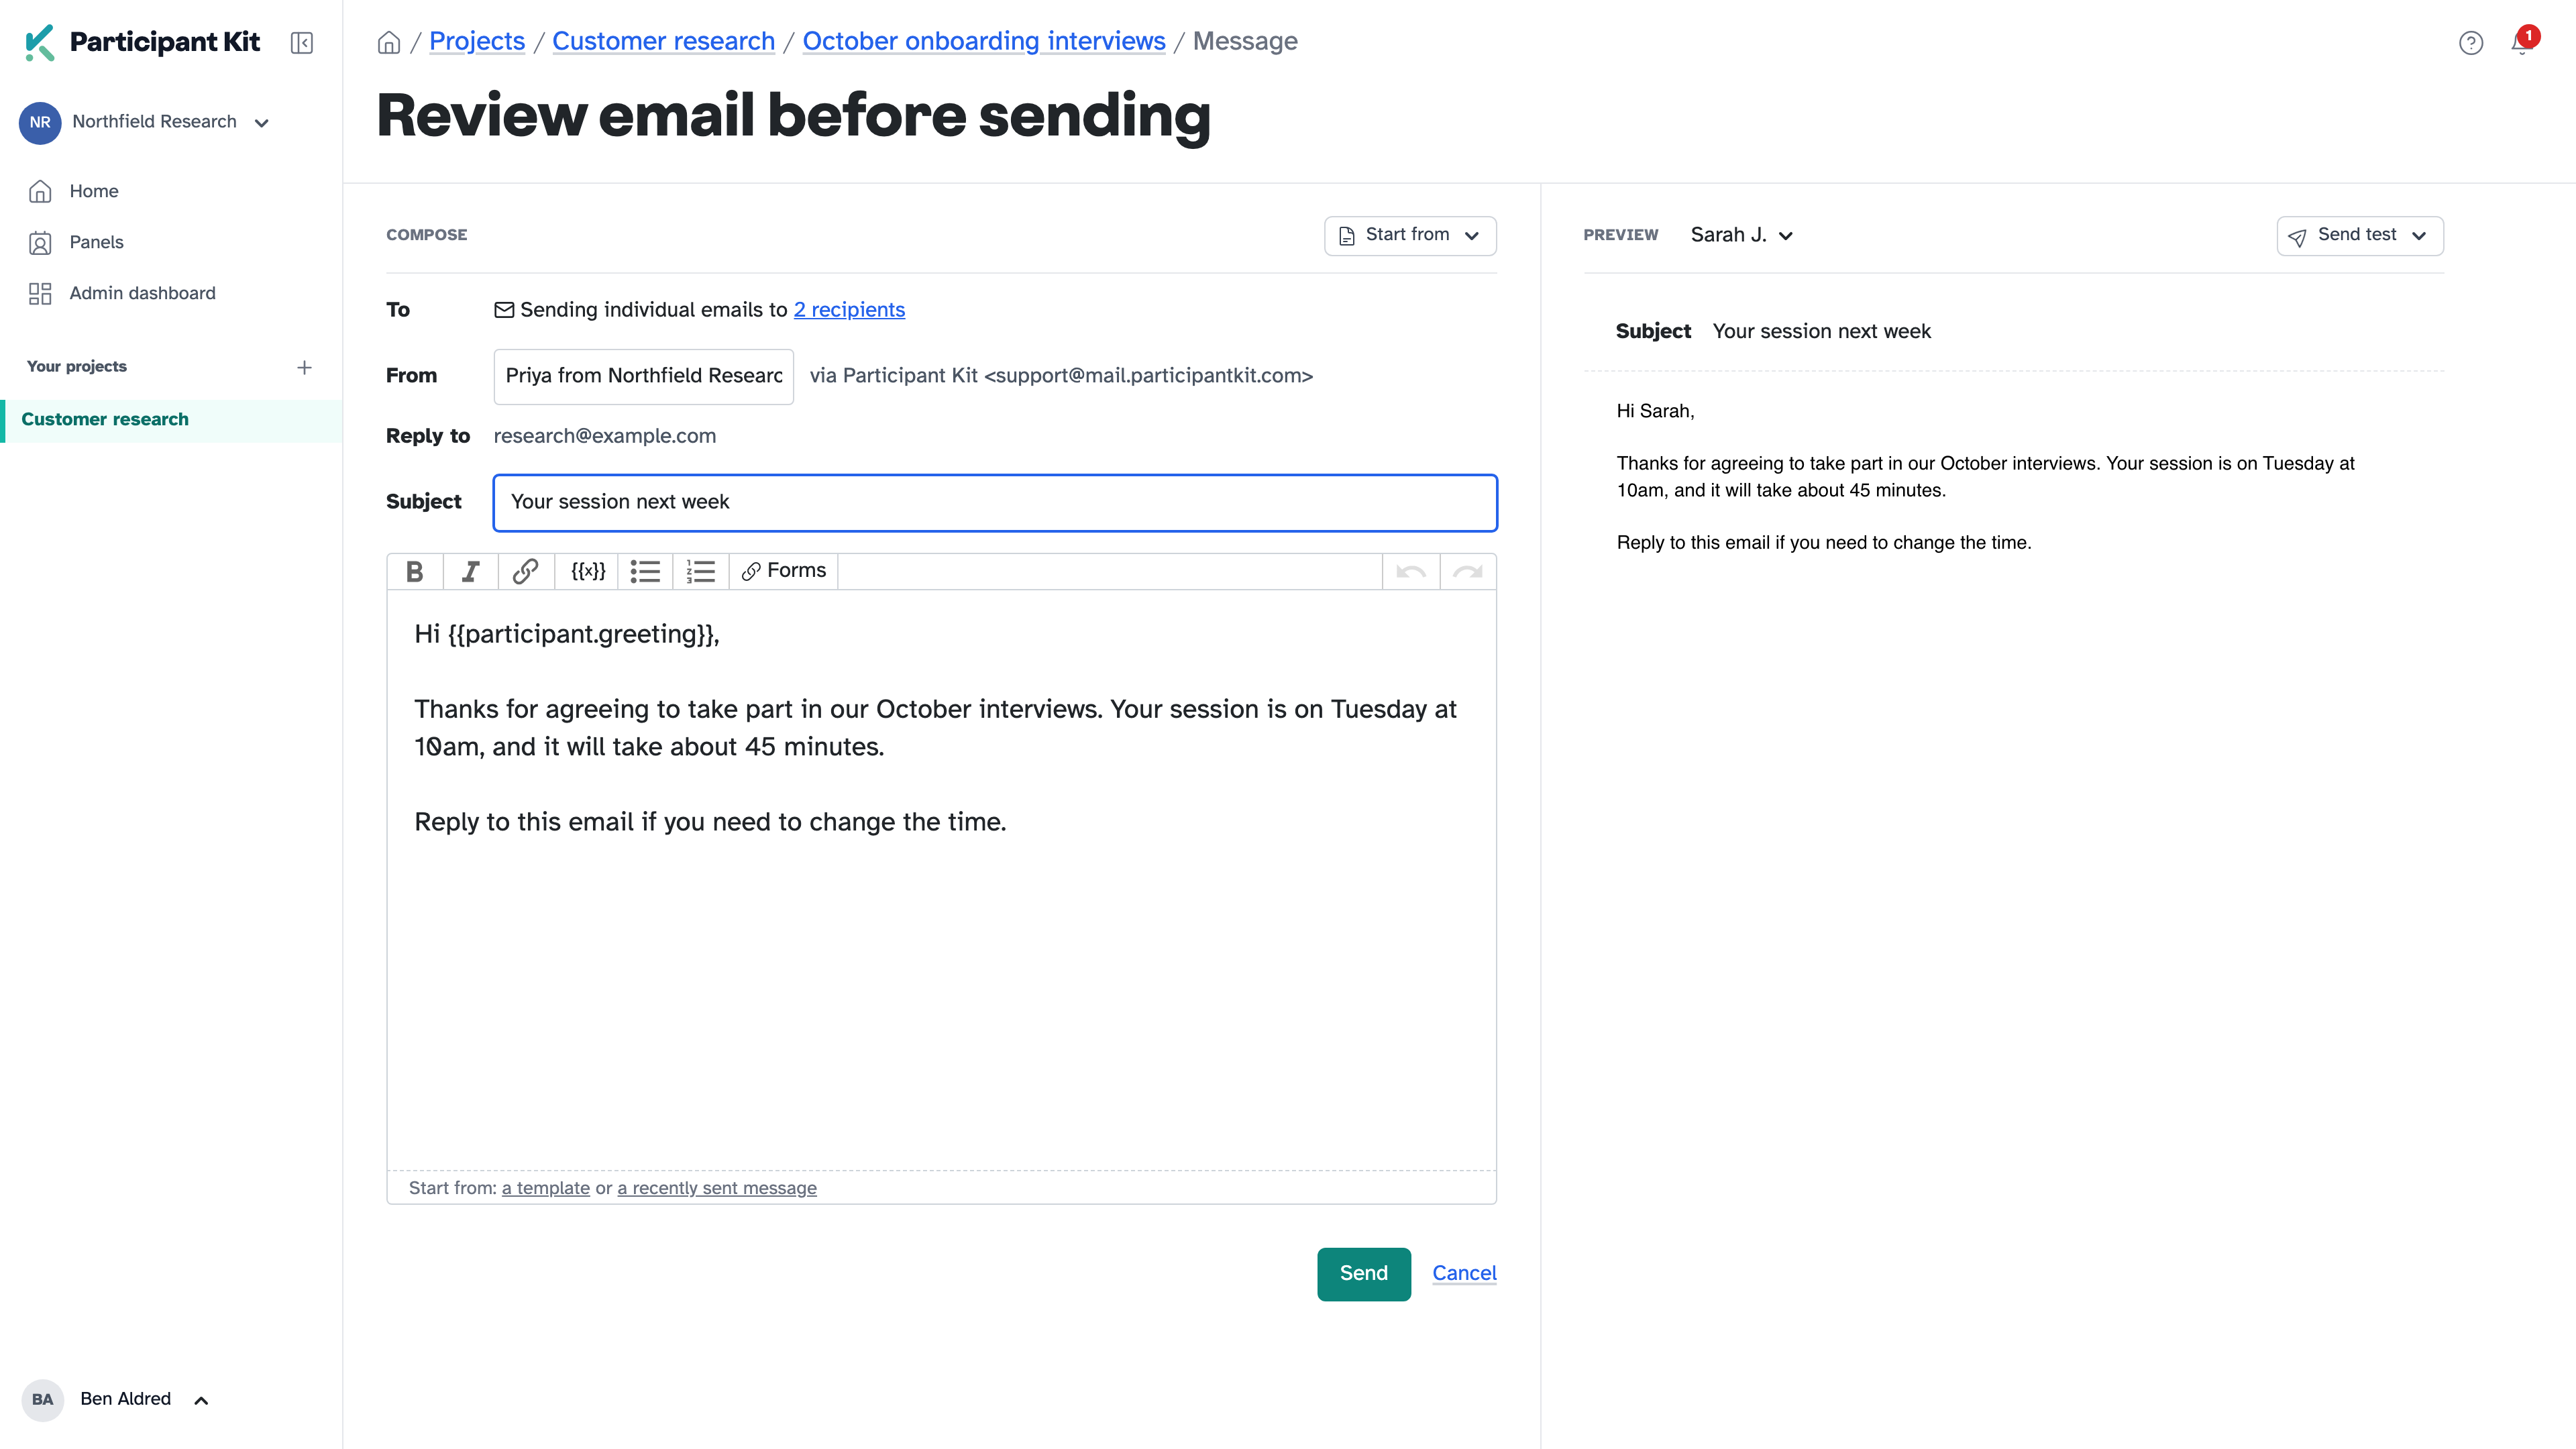
A page called Review email before sending opens. To shows how many people you’re sending to.
2. Write your message
Add a Subject and write your message. From shows the name people will see, and you can change it.
Your message saves as you type, so it survives a refresh. If you start a new message, any message you haven’t sent is deleted.
Start from a template or an earlier message
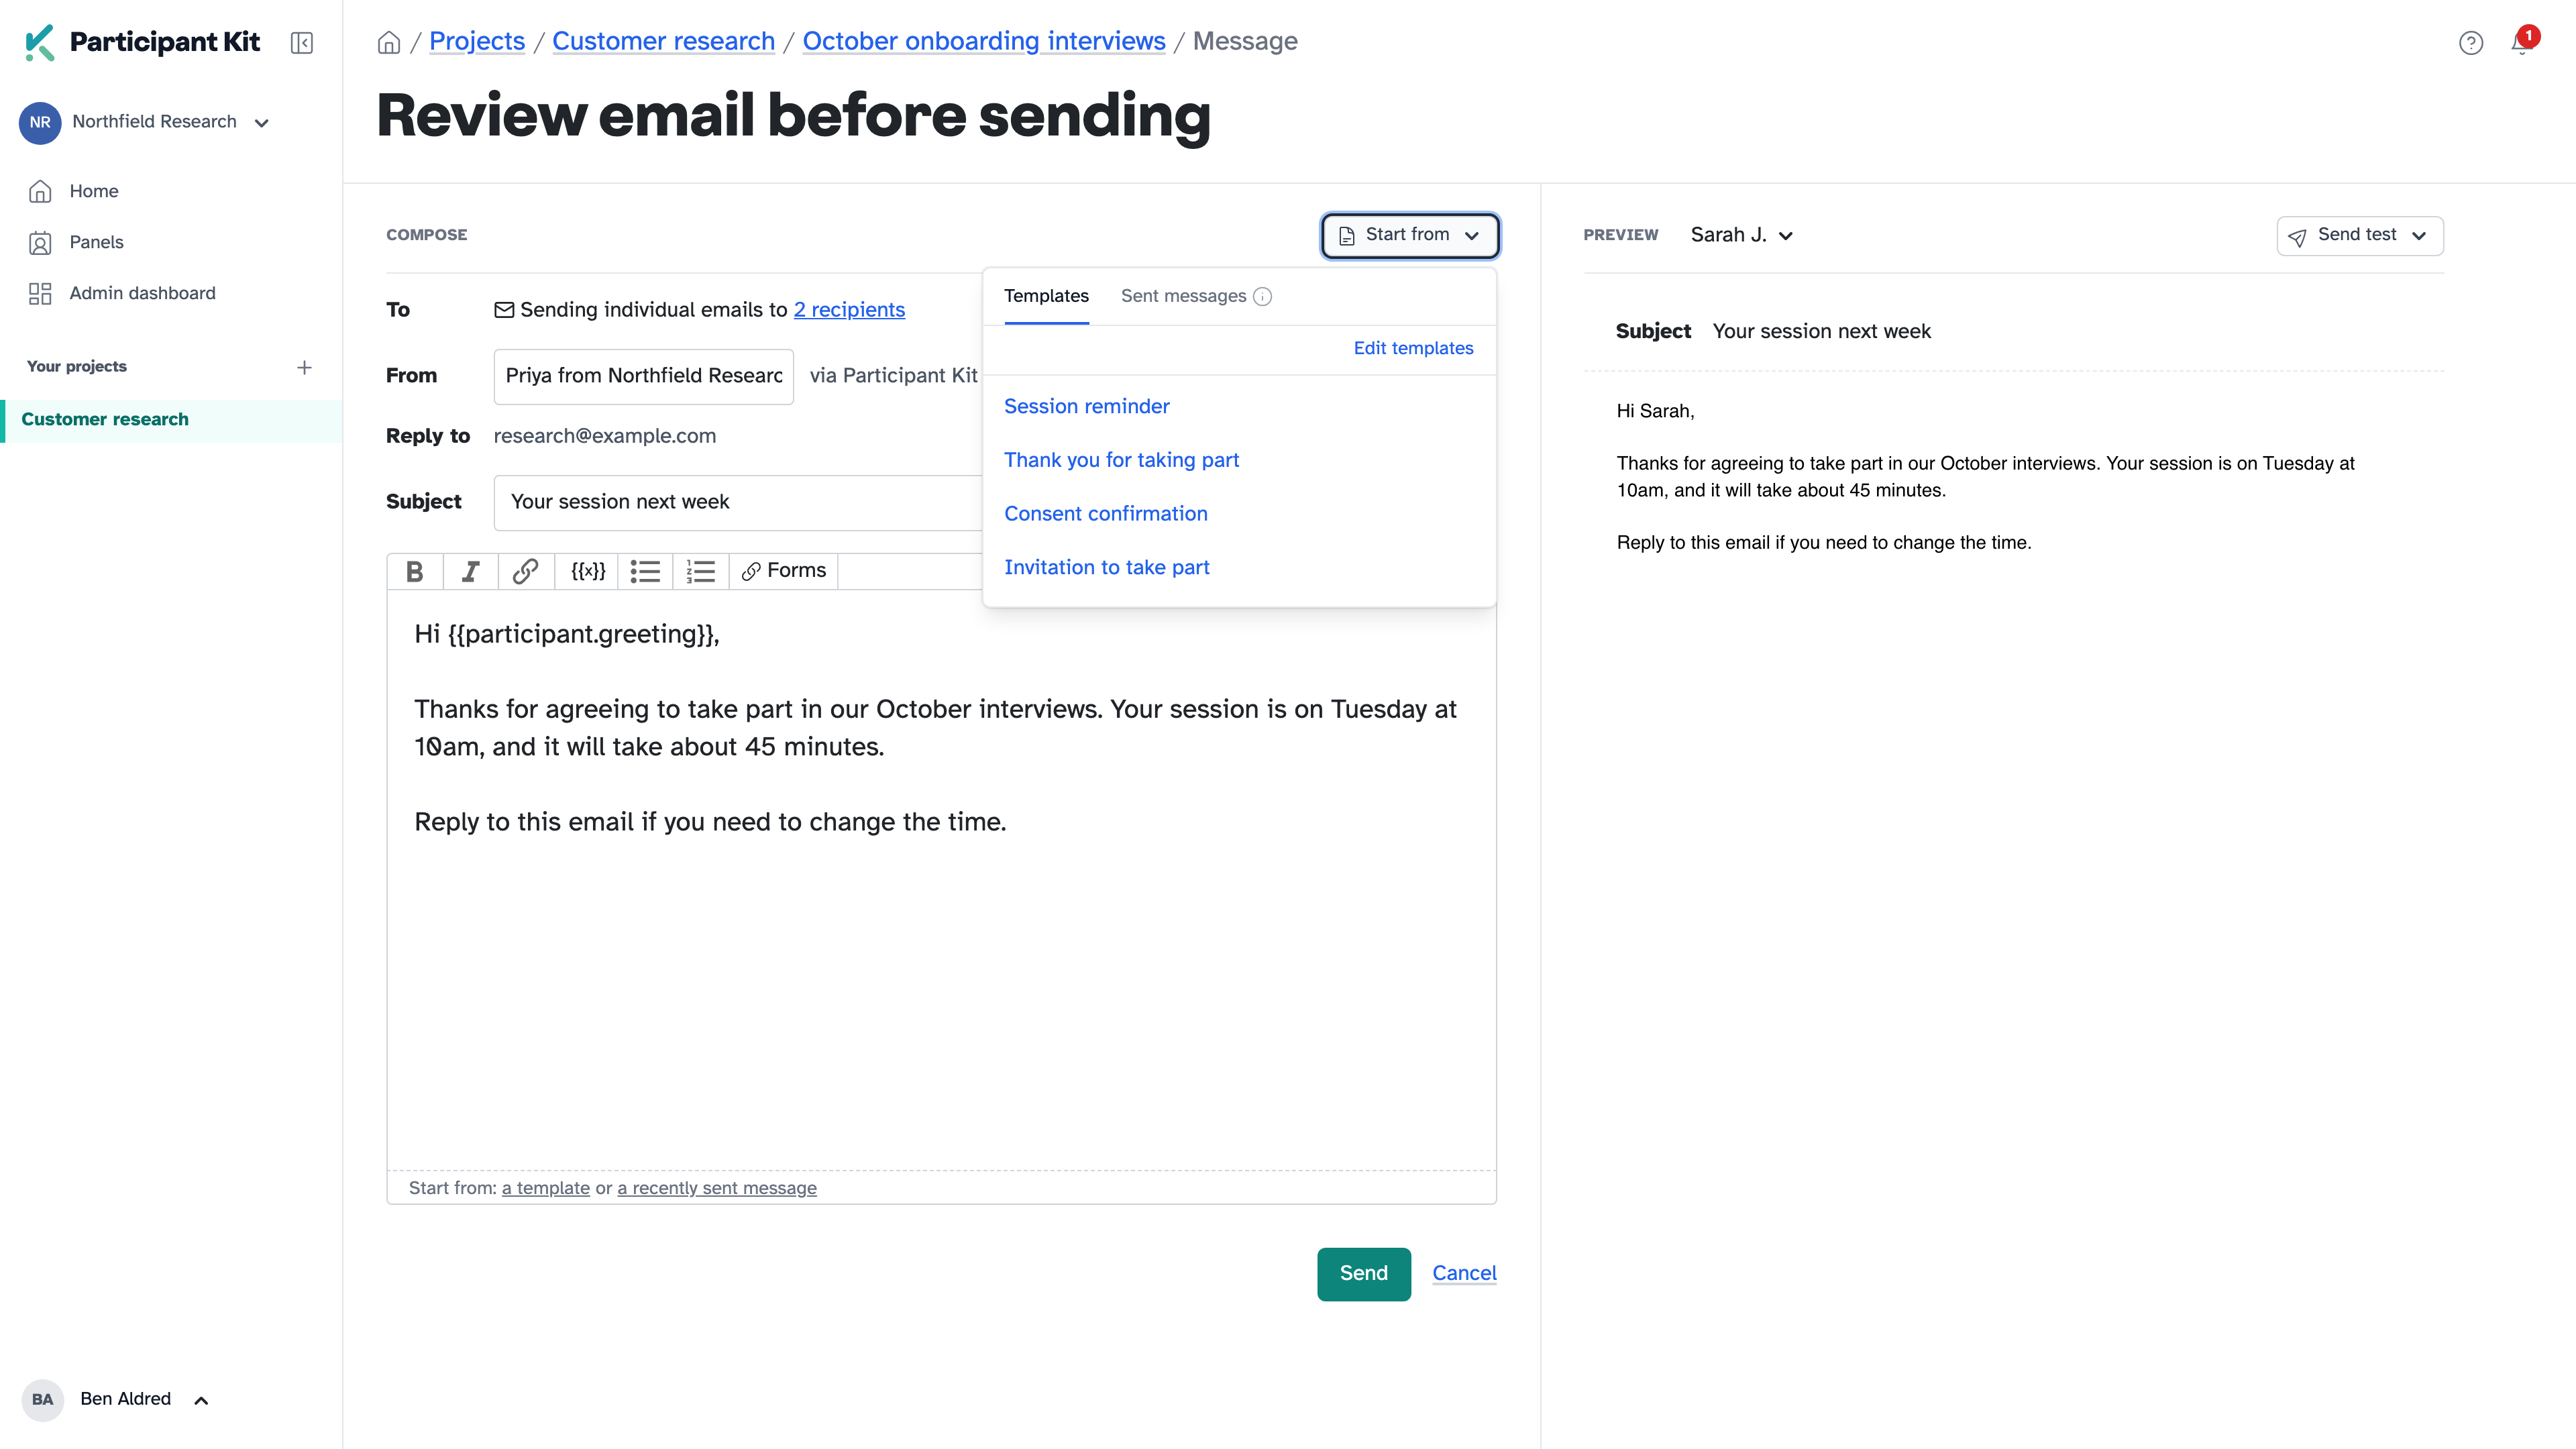
Click Start from, top right. Templates lists your organisation’s email templates. Once you’ve sent messages in this study, Sent messages lists the last 10 you sent, so you can reuse one.
Pick one and click Use this template or Use this message. It replaces the subject and message you’ve written.
Personalise it
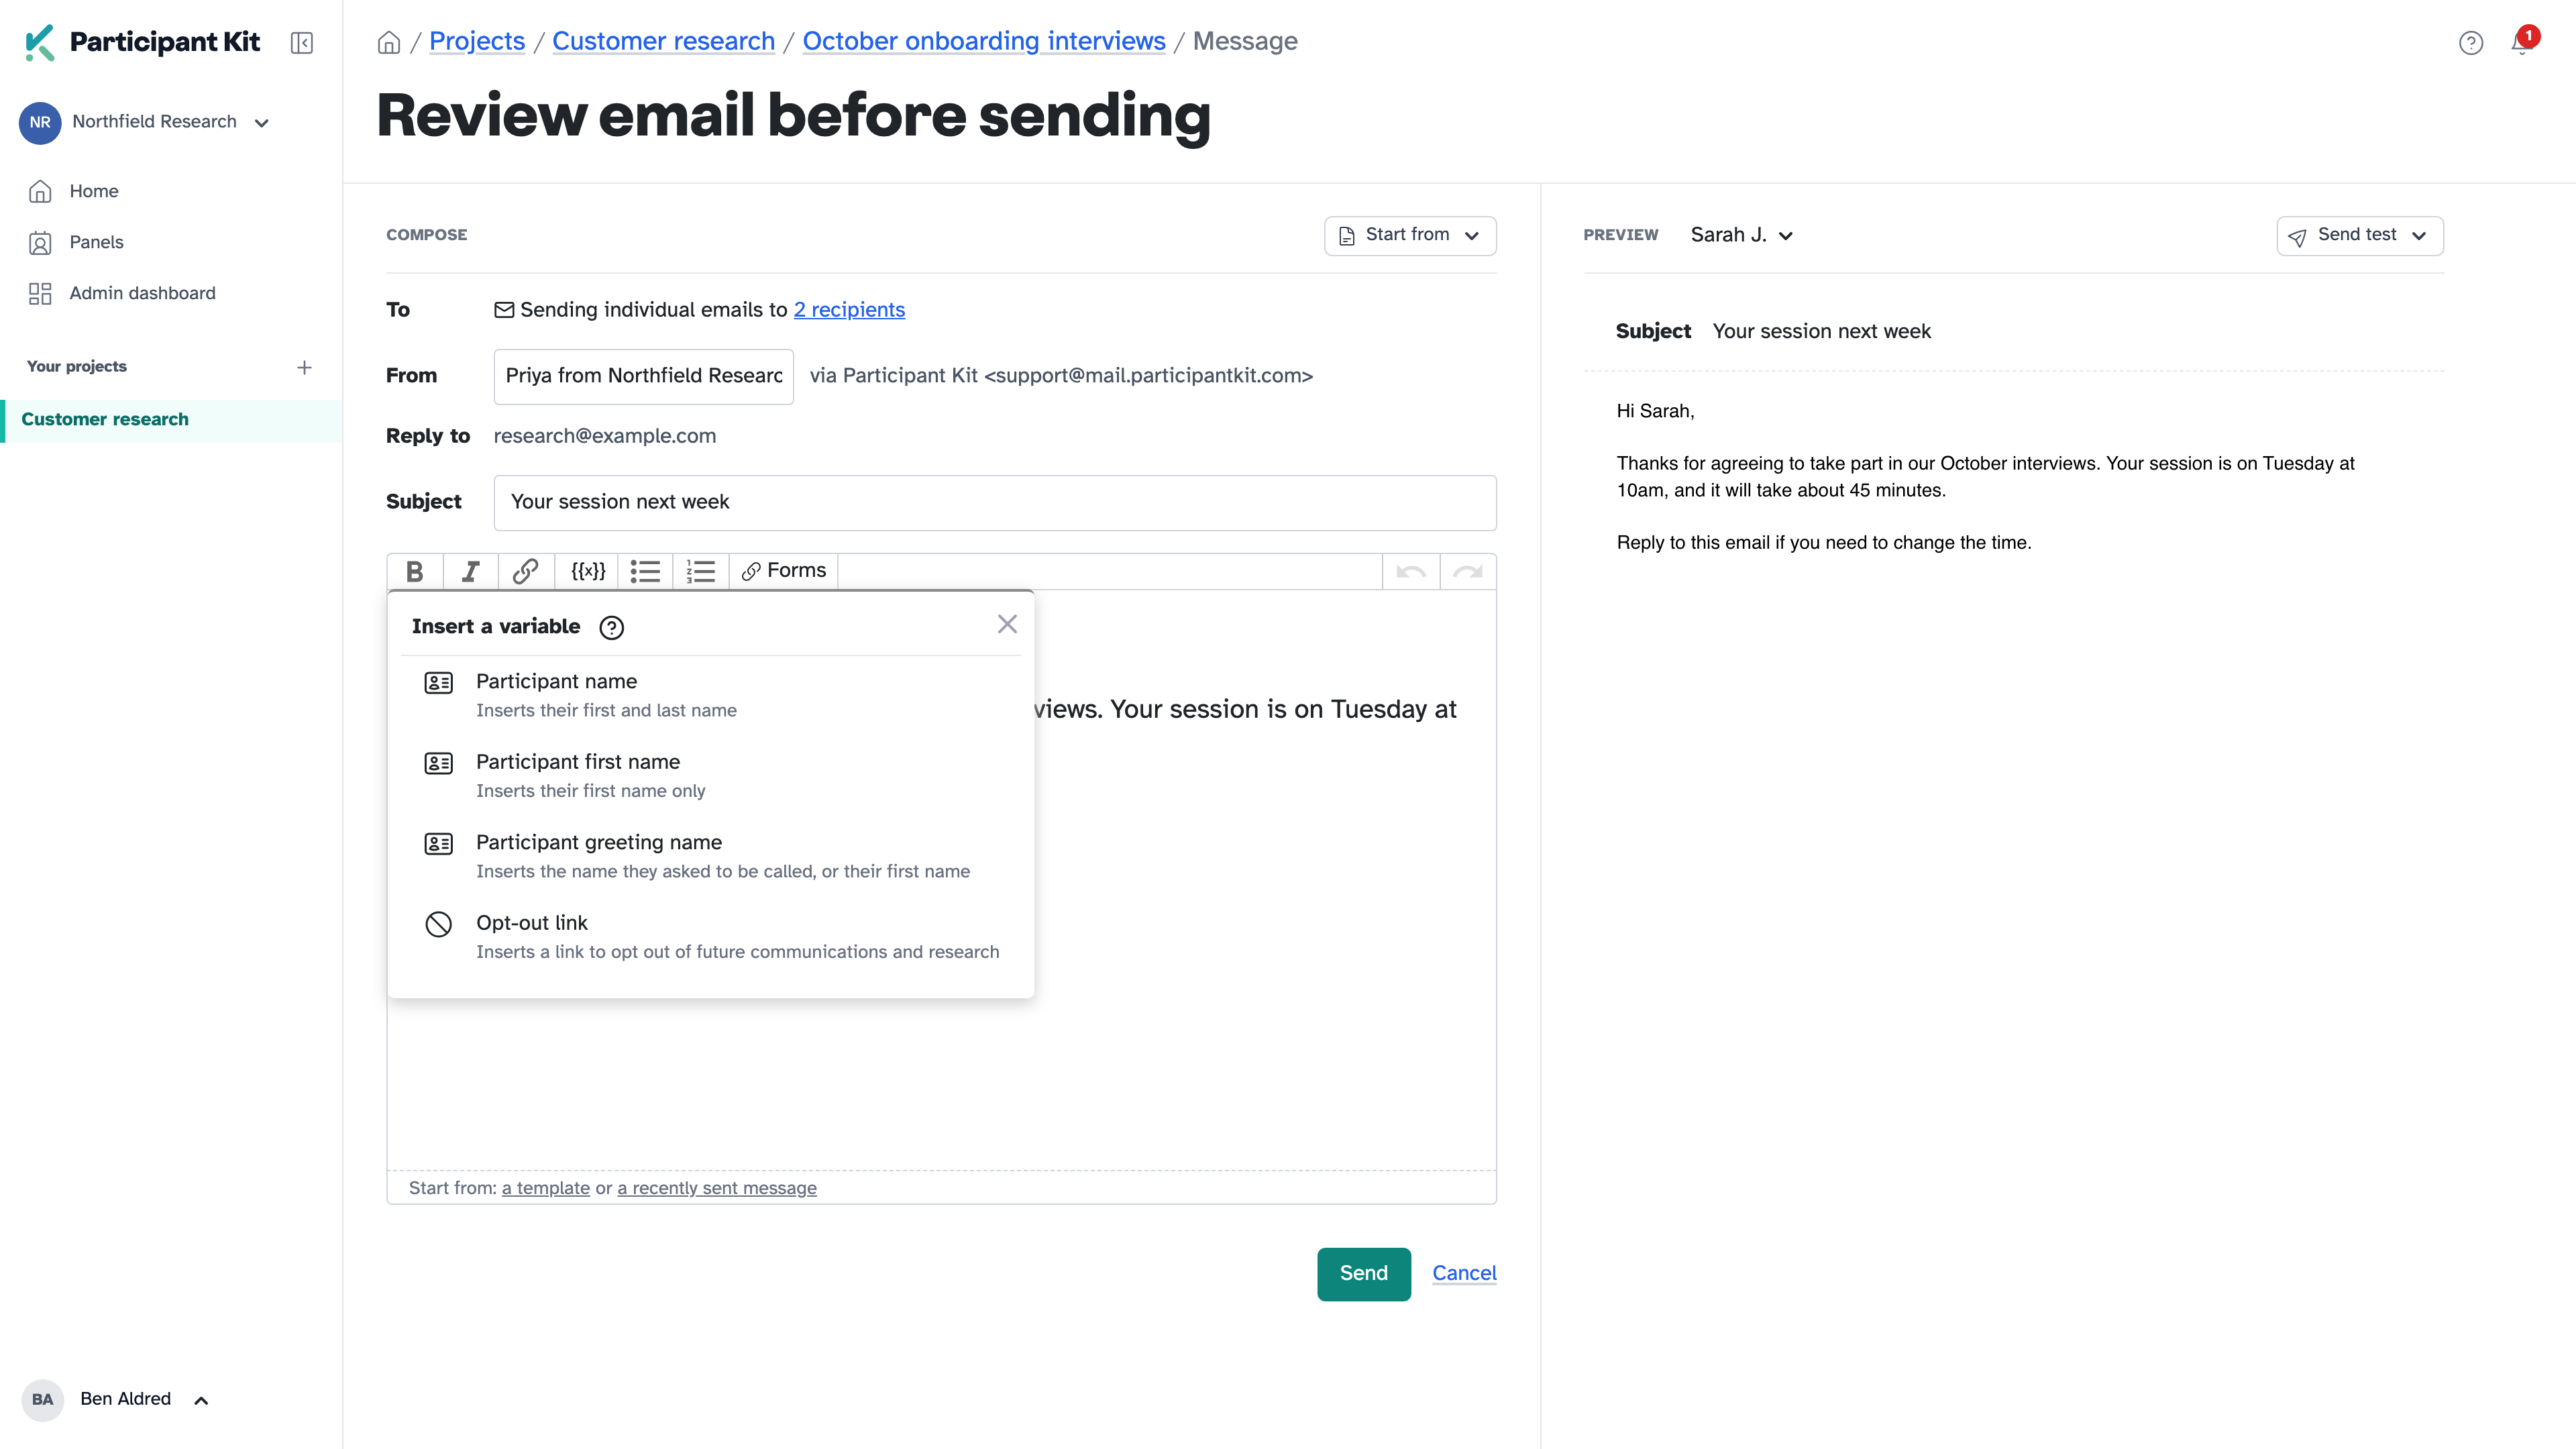
Click the {{x}} button in the toolbar. Insert a variable lists what you can add:
- Participant name: their first and last name
- Participant first name: their first name only
- Participant greeting name: the name they asked to be called, or their first name
- Opt-out link: a link to opt out of future communications and research
Add a form link
Click Forms in the toolbar and choose a form under Select form.
Add Button text if you want your own words on the button. Leave it blank and the button is named after the type of form. Then click Insert link.
What each person gets depends on the form:
- a consent form or agreement, like an NDA: a link that’s unique to them, so their e-signature is tied to who they are
- any other form, like a screener: a link that tells the form who they are, so it fills in their name and email address
When you add a consent form or agreement that hasn’t been sent before, a warning appears under your message. Sending locks the form, so you can’t edit it afterwards. That’s for legal reasons: people must sign the version they were sent. Tick the box to confirm you’ve finished editing the form, and then you can send.
3. Preview and test
The preview shows the email as it will arrive. On a wide screen, it’s beside your message. On a smaller screen, click Preview to see it.
Use the name at the top of the preview to switch between recipients.
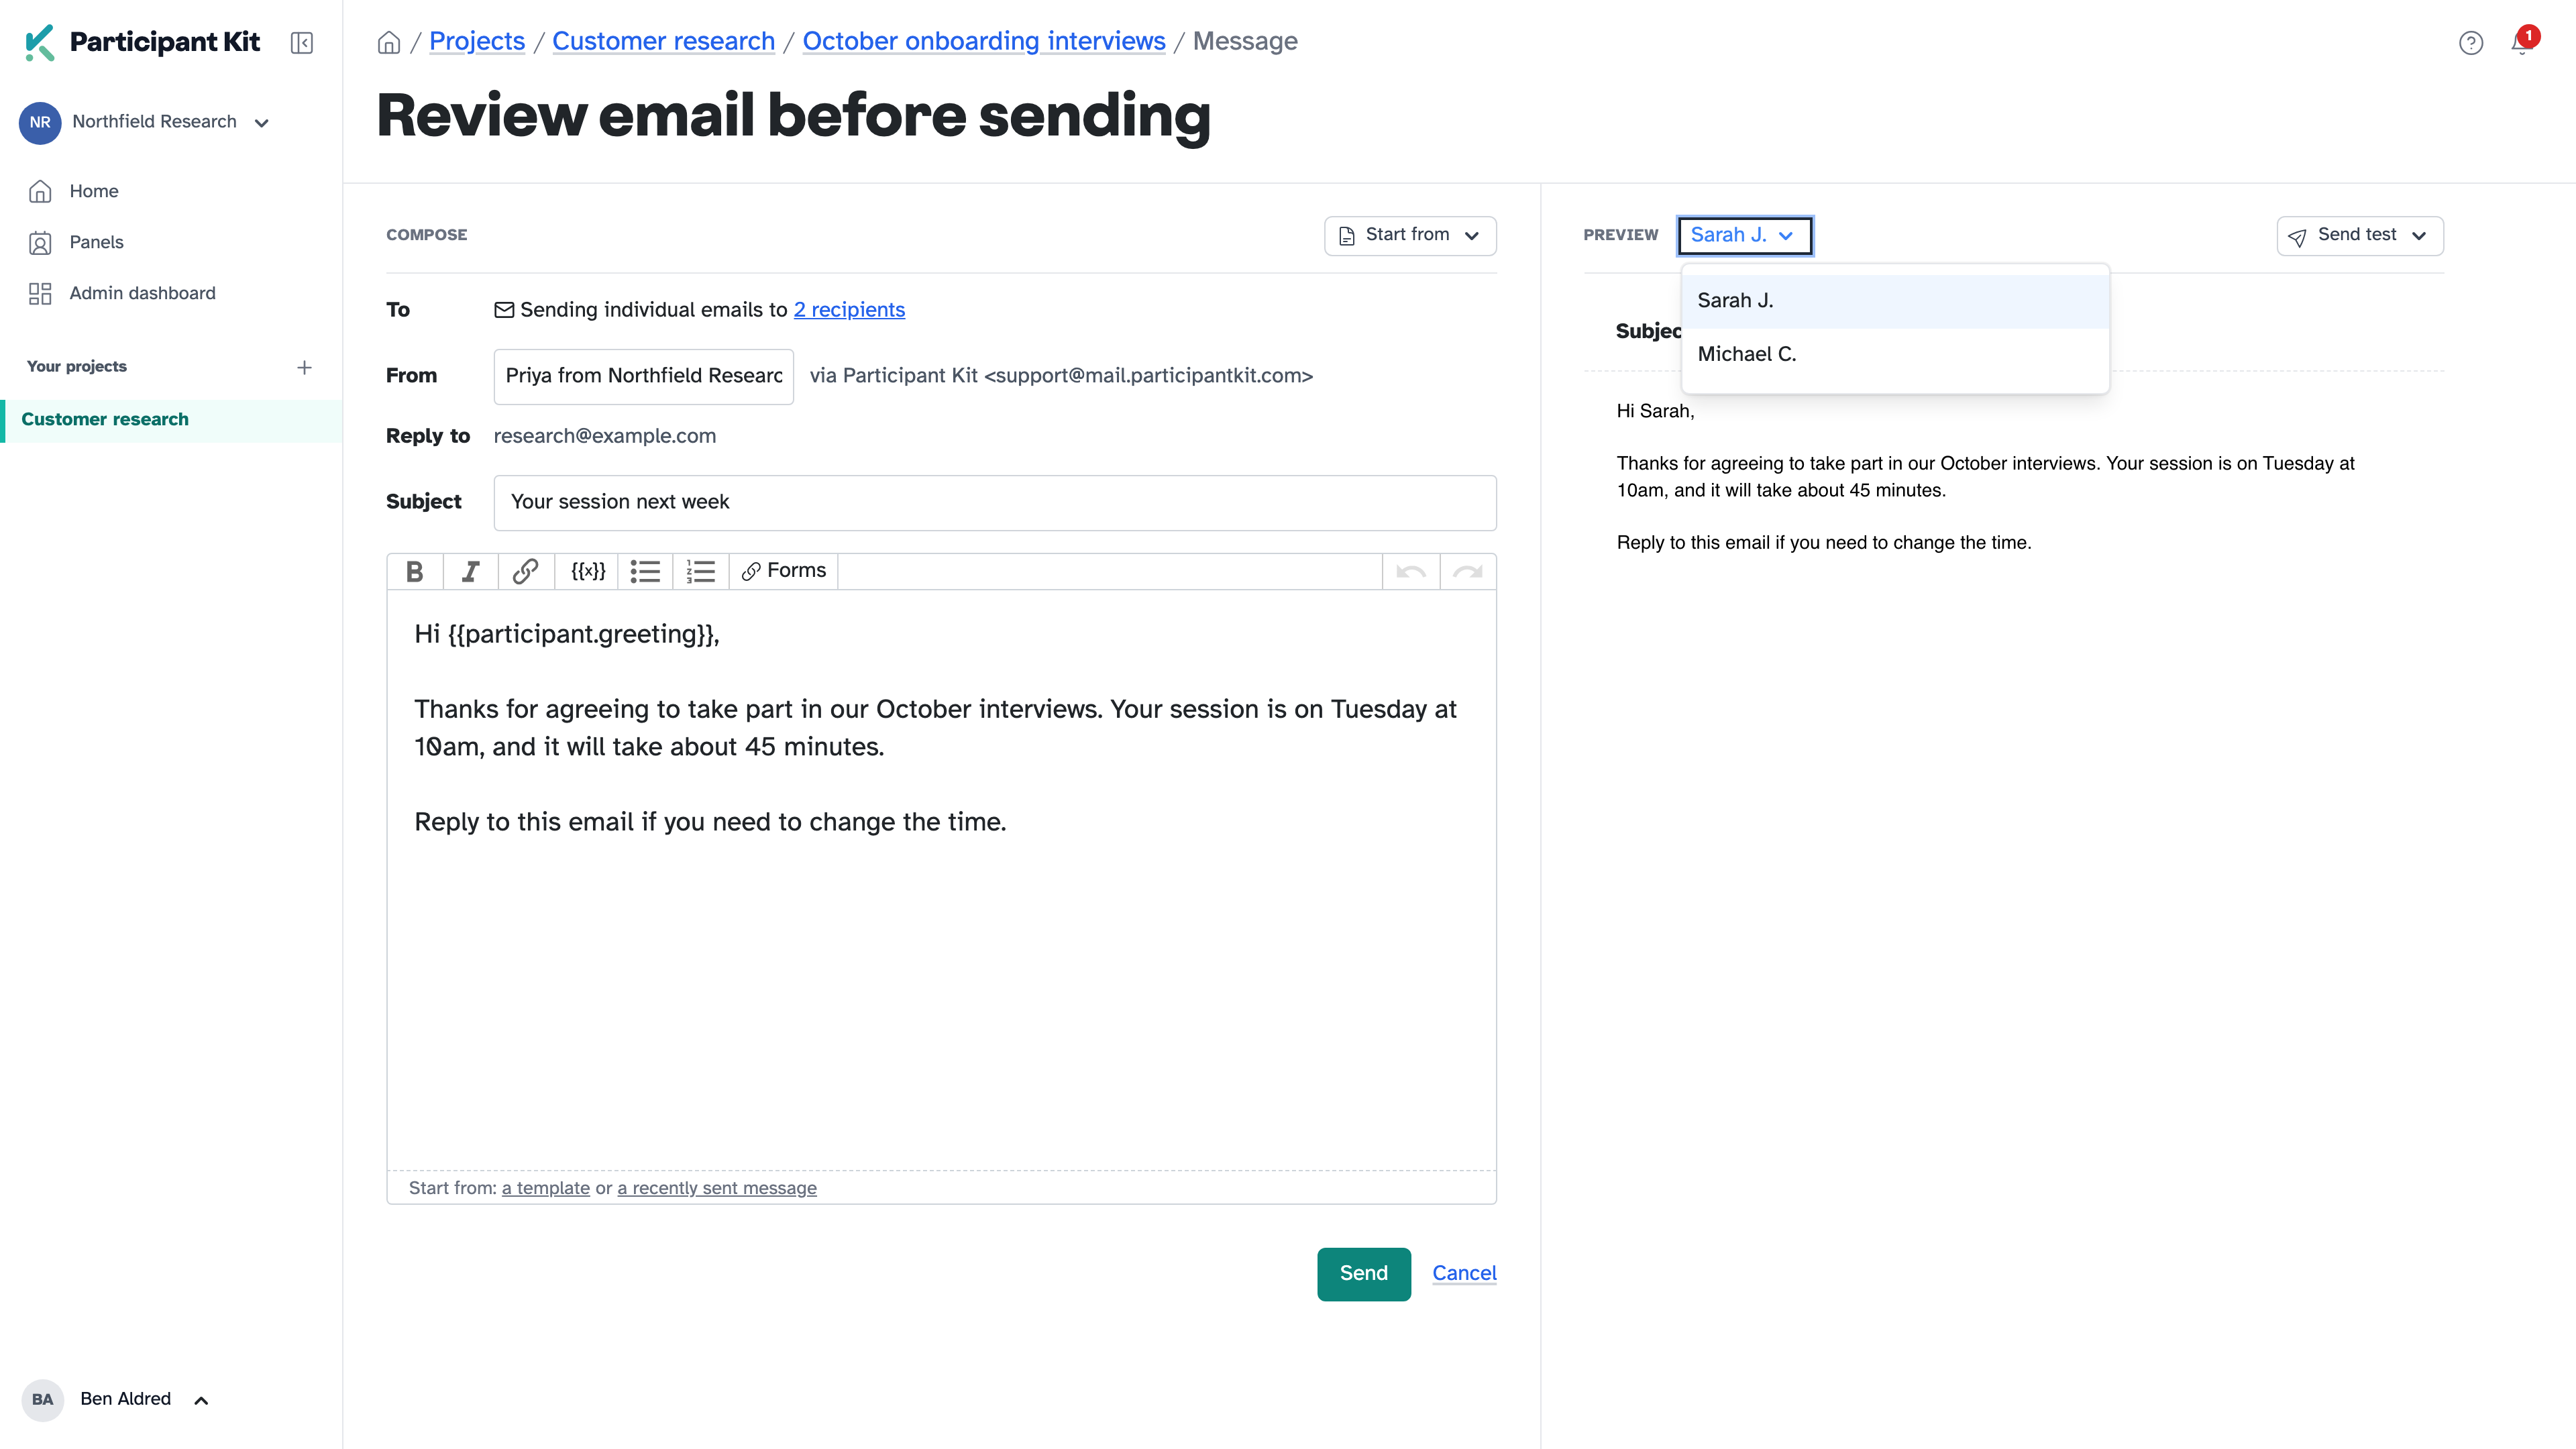
Click Send test to send a copy to yourself. The test uses placeholder text instead of a real person’s details. Use the preview to check names, and the test to see how it looks in your inbox.
4. Send it
Click Send, under your message. On a smaller screen, go back to Compose first.
You’re taken back to the study, with a message saying the emails are sending. It can take a few minutes for everyone to get theirs, and you can’t undo it.
Key takeaways
💡 Remember: Sending a consent form or agreement locks it. Finish editing the form before you send.
🧪 Try: Start your message with Participant greeting name, so people are addressed the way they asked to be.
⚠️ Watch for: Choosing a template or an earlier message replaces what you’ve already written.
⚡ Quick tip: Reuse a message from Sent messages when you’re emailing the next group of participants in the same study.