
Asking your panel more questions with a screener
Use a panel screener when you want to know more about the people already on your panel. For example, which devices they use or whether they’ve taken part in a diary study before.
You send the screener in a broadcast. Each panellist gets their own link, so their answers are saved to their own panel record. You can then filter your panel by those answers when you’re looking for people for a study.
A panel screener isn’t the same as a study screener. A study screener checks whether someone is right for one study. A panel screener adds to what you know about people on your panel, whatever study comes next. To screen people for a single study, see Recruiting into a study with screeners.
This 3-minute video shows three ways to use a panel screener.
Who can use this
Panel managers and organisation admins can create, edit and send panel screeners.
1. Create the screener
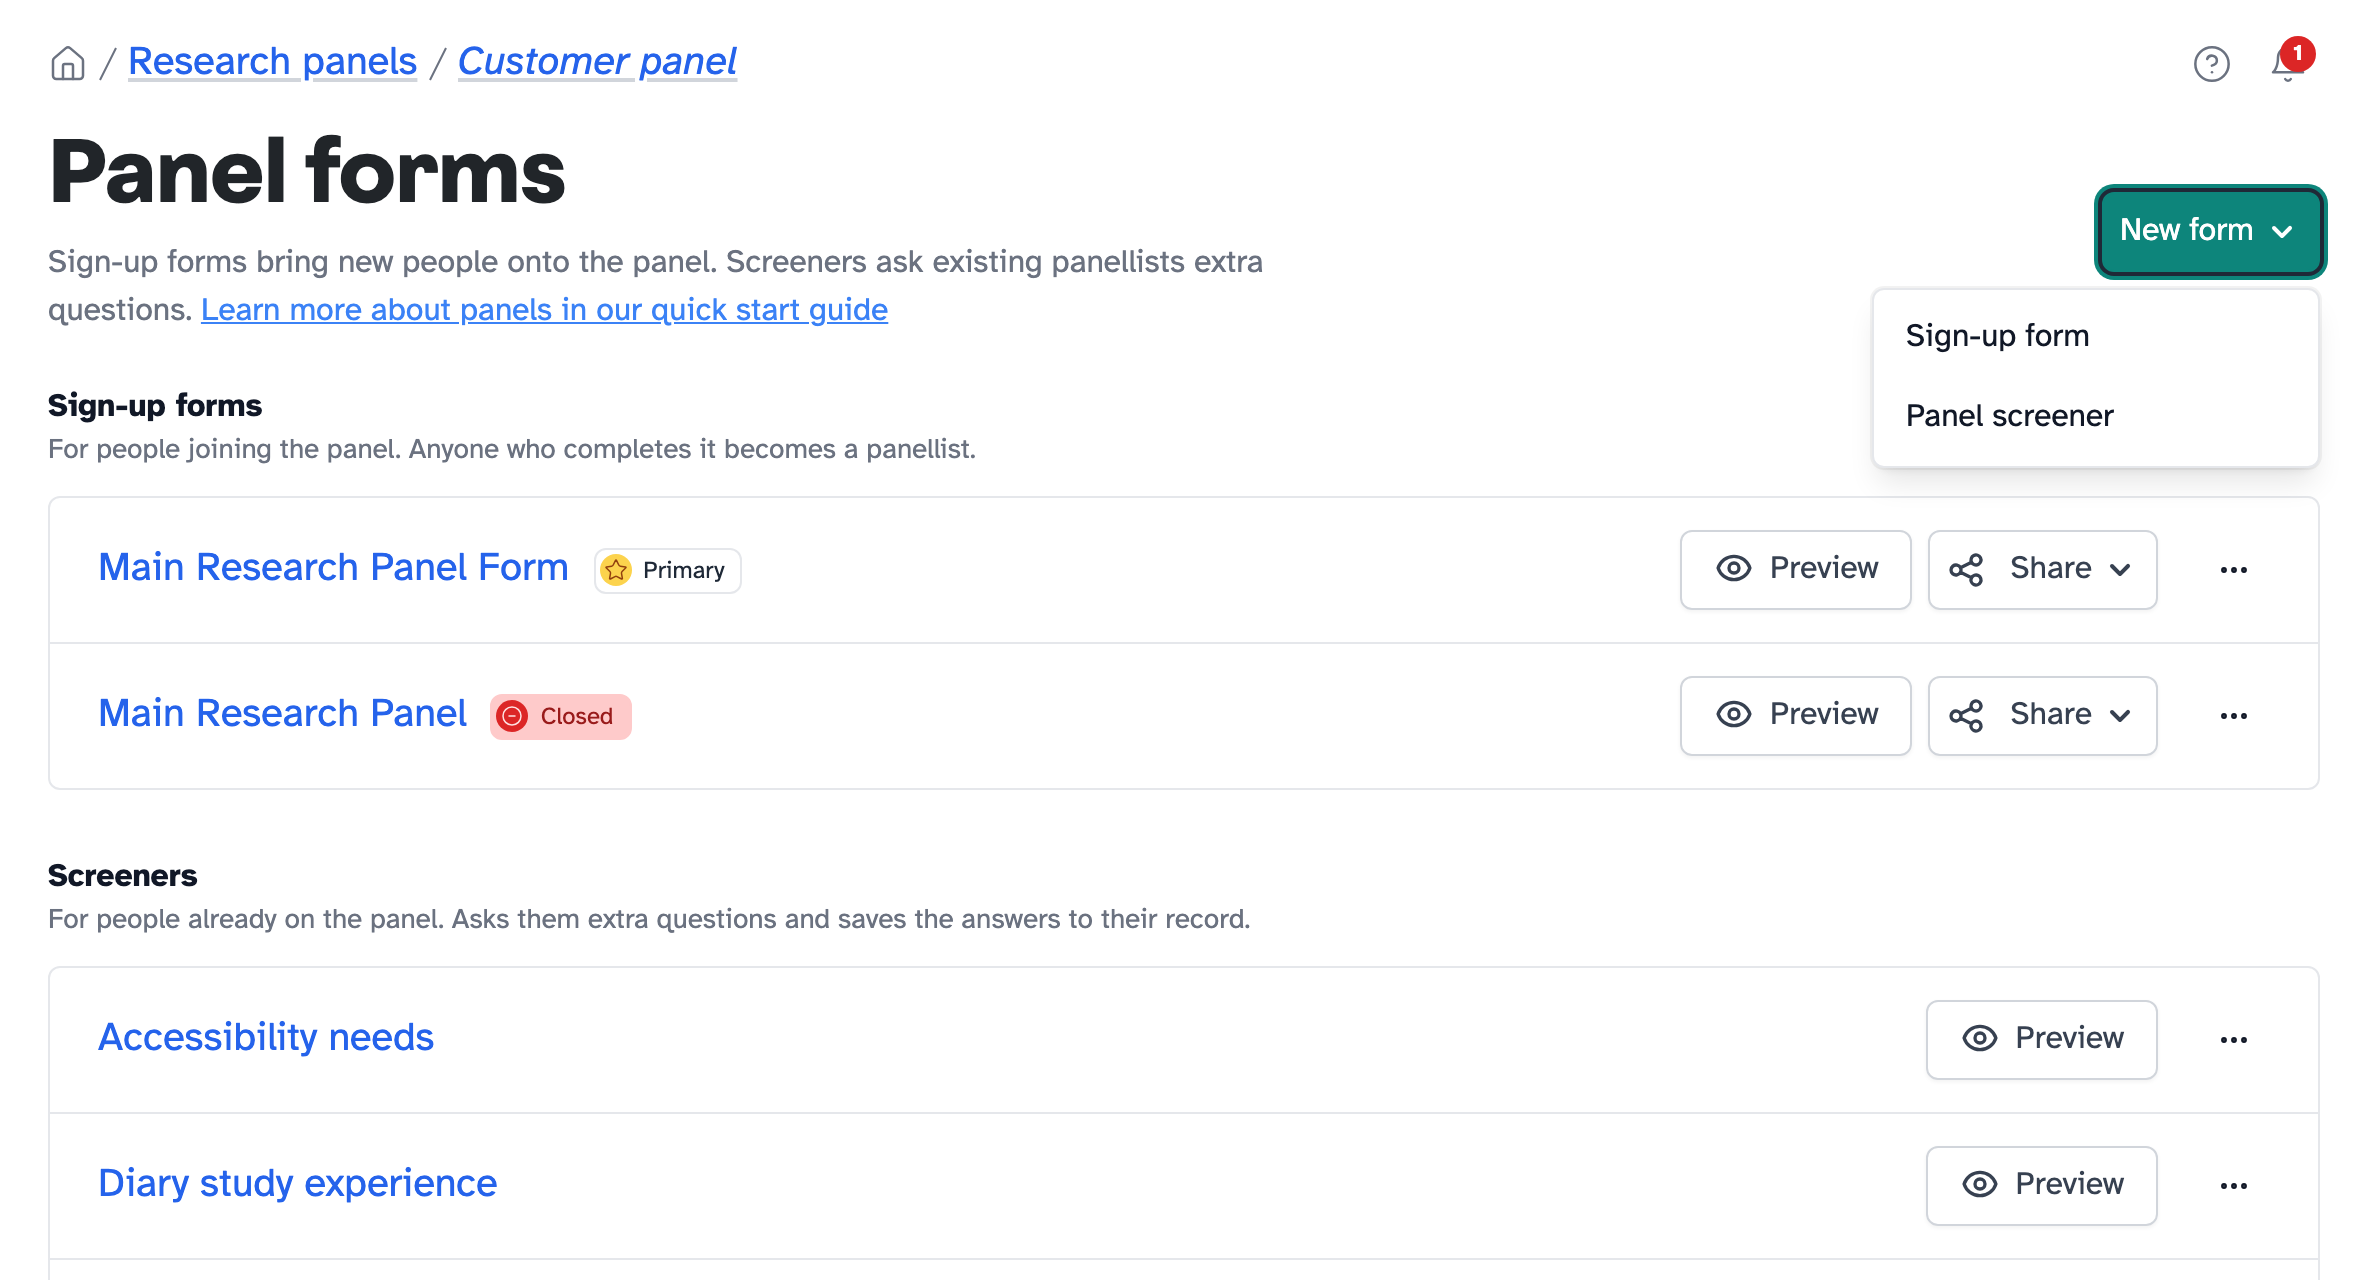
- Open your panel and click Panel forms in the sidebar.
- Click New form, then Panel screener.
The screener opens in the form builder, which saves as you go. Give the page a heading in Page title, for example “A few questions about your devices”. Panellists see it at the top of the screener. Until you change it, it says “Untitled page”.
The page also starts with placeholder text, shown in red. Replace it with a sentence or two about what you’re asking and why. Say how long it takes.
2. Add your questions
- Click New form block.
- Choose a question type. Use Checkboxes if people can pick more than one answer.
- Click Choose a field…, under the description of the question type.
- Find the panel field you want the answers saved to.
- Click Insert next to it.
Choosing a field is called mapping. Mapped answers are saved to that field on each person’s panel record, so you can see them in your panel table and filter by them.
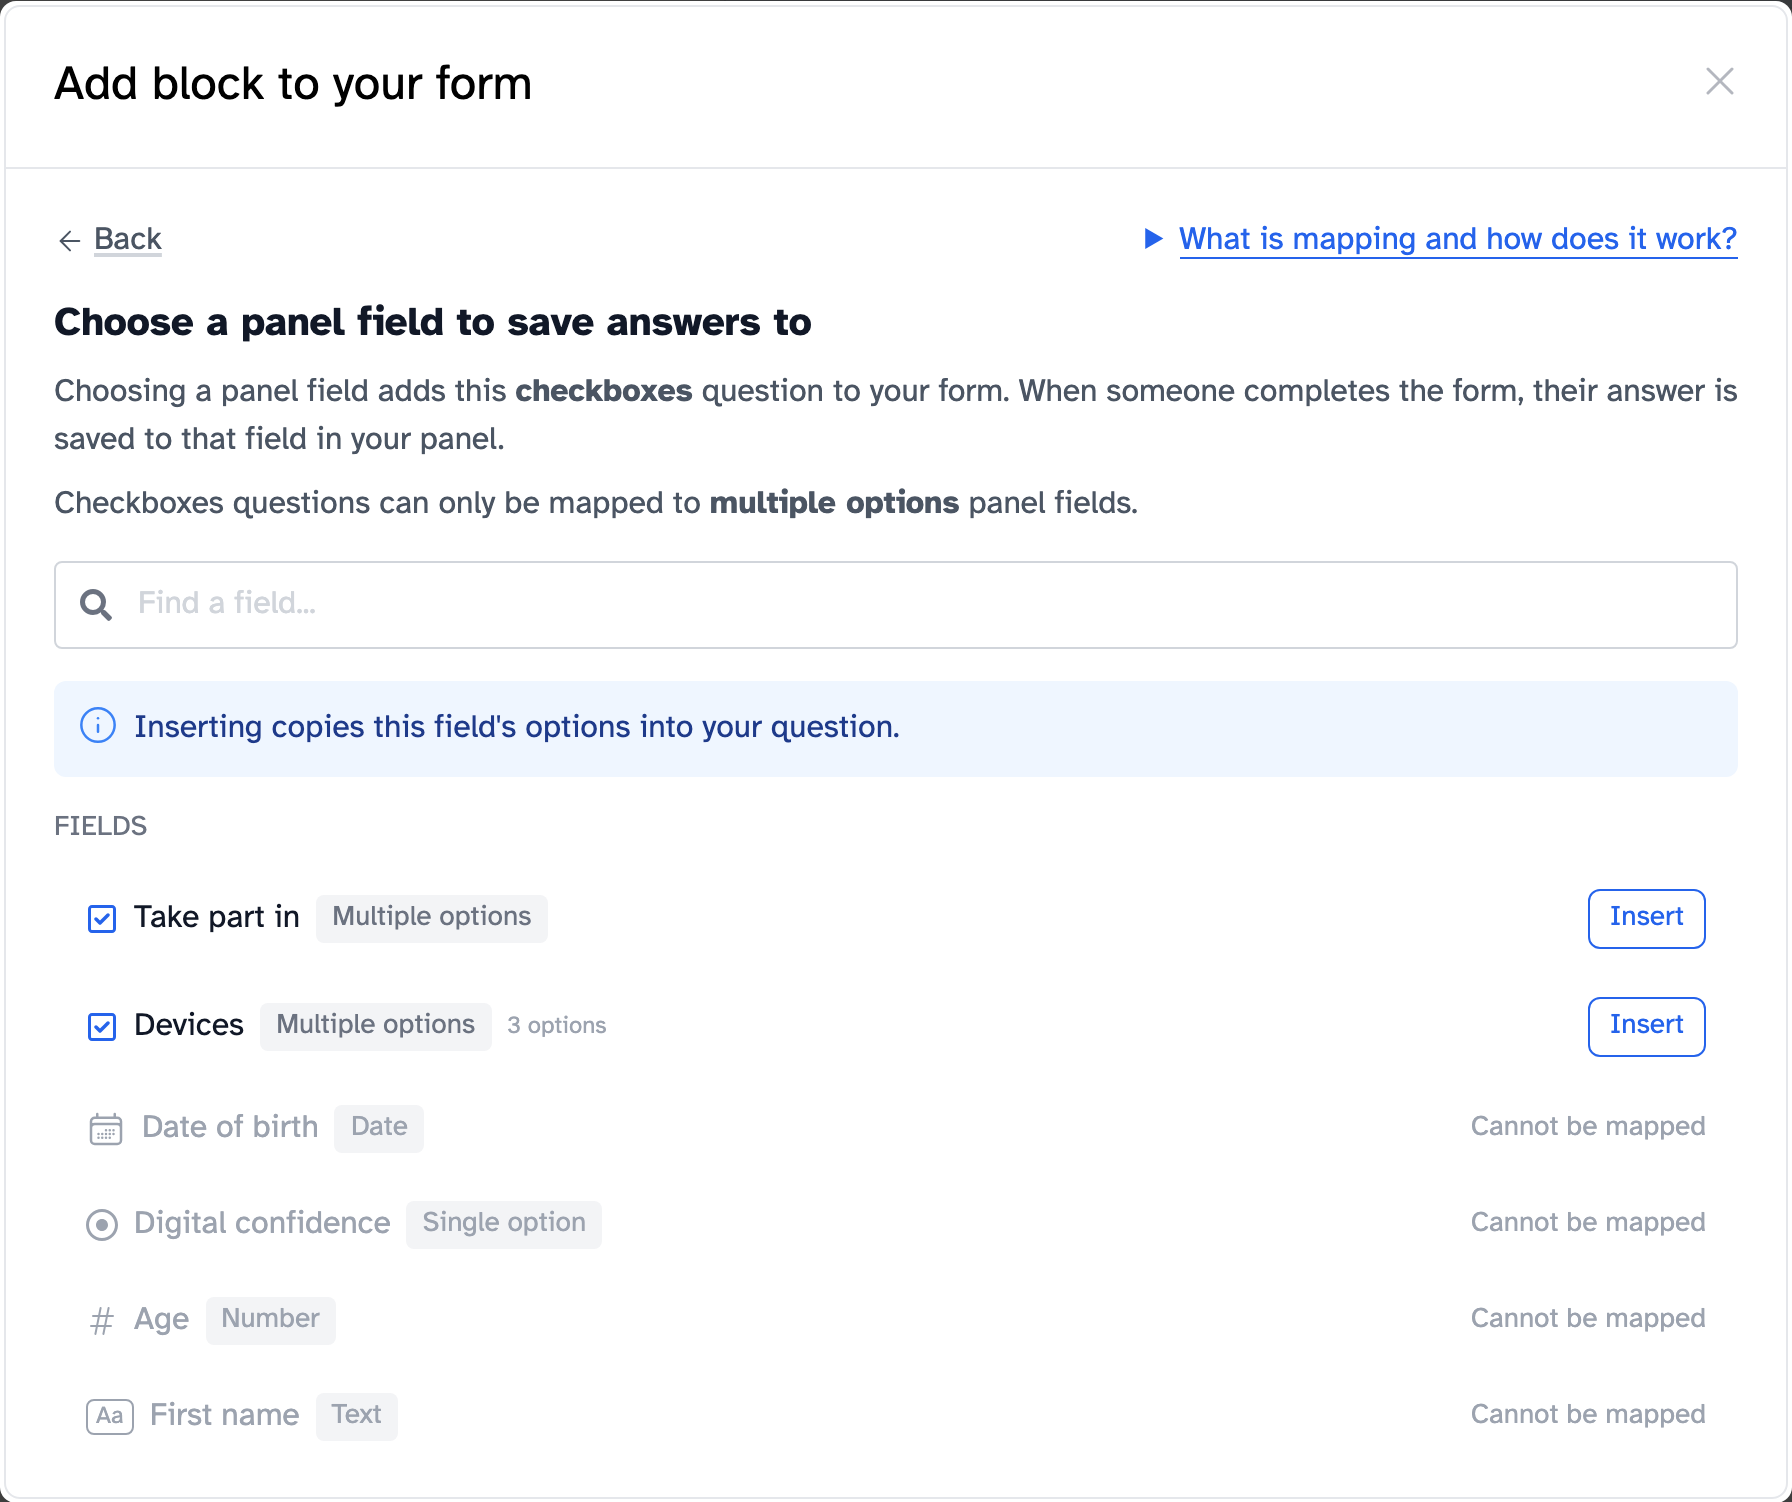
You can only map a question to a field of the same kind. Fields that don’t fit say Cannot be mapped. If you map a choice question to a field that already has options, the field’s options are copied into your question.
If none of your fields fit:
- Add a field lets you add one of your organisation’s fields to this panel or click Create a new field to make one. Then click Insert next to it.
- Do not map this question keeps the answer on each person’s panel record, under Unmapped data. It won’t show in your panel table or filters.
A mapped answer replaces what’s already in that field, including fields like First name. Only map a question to a field you’re happy for panellists to update.
3. Give it a title people will see
Click the Settings tab at the top of the builder and fill in the Public title. Panellists see it on the screener. New screeners are called “Panel screener” until you change it.
The Internal title is the name you see in Participant Kit, including when you add the screener to a broadcast.
To see the screener the way panellists will, click Preview at the top of the builder, then Preview full form.
4. Send it in a broadcast
- Open your panel and go to Broadcasts.
- Click New broadcast.
- Write your message.
- Click Forms in the toolbar.
- Under Select screener, choose your screener. Screeners are listed by their Internal title.
- Type the Button text, for example “Answer the questions”. If you leave it blank, the button says “Complete the form”.
- Click Insert link.
- Use the Preview tab to check the email as different panellists.
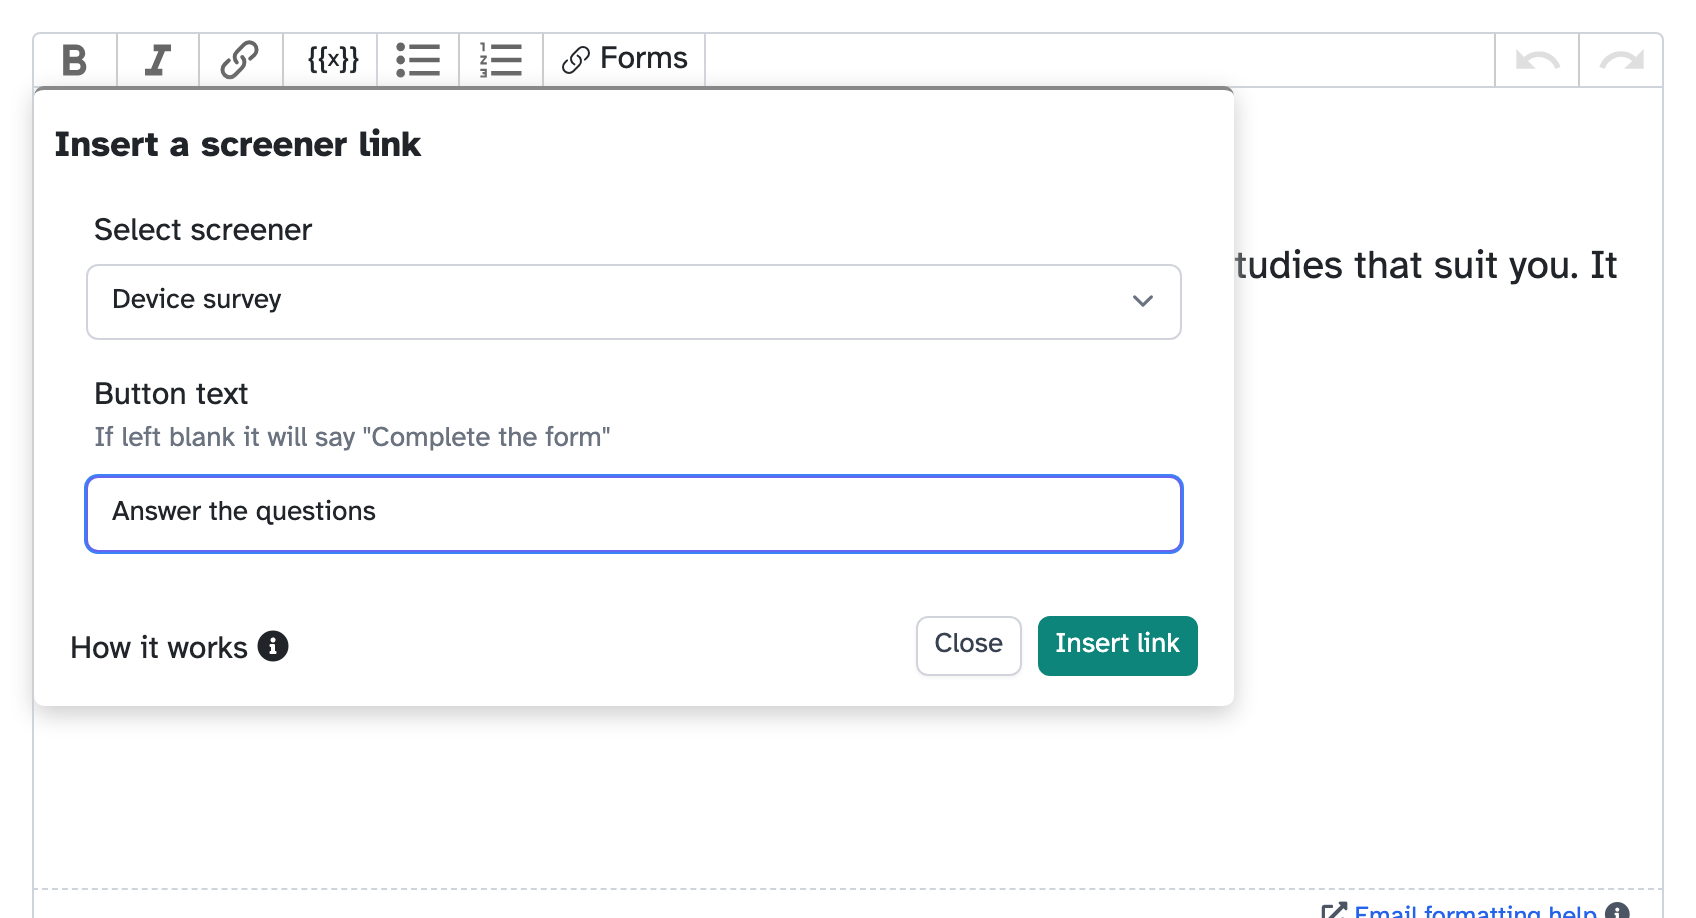
Each person gets their own link, so their answers go to their own record. You can also add a screener link to your sign-up form’s confirmation page or email. Participant Kit puts in each person’s own link there too.
Every open screener on the panel is listed under Select screener as soon as it’s created, finished or not. Check you’ve picked the right one.
For more on writing and sending broadcasts, see Sending broadcasts.
What panellists see
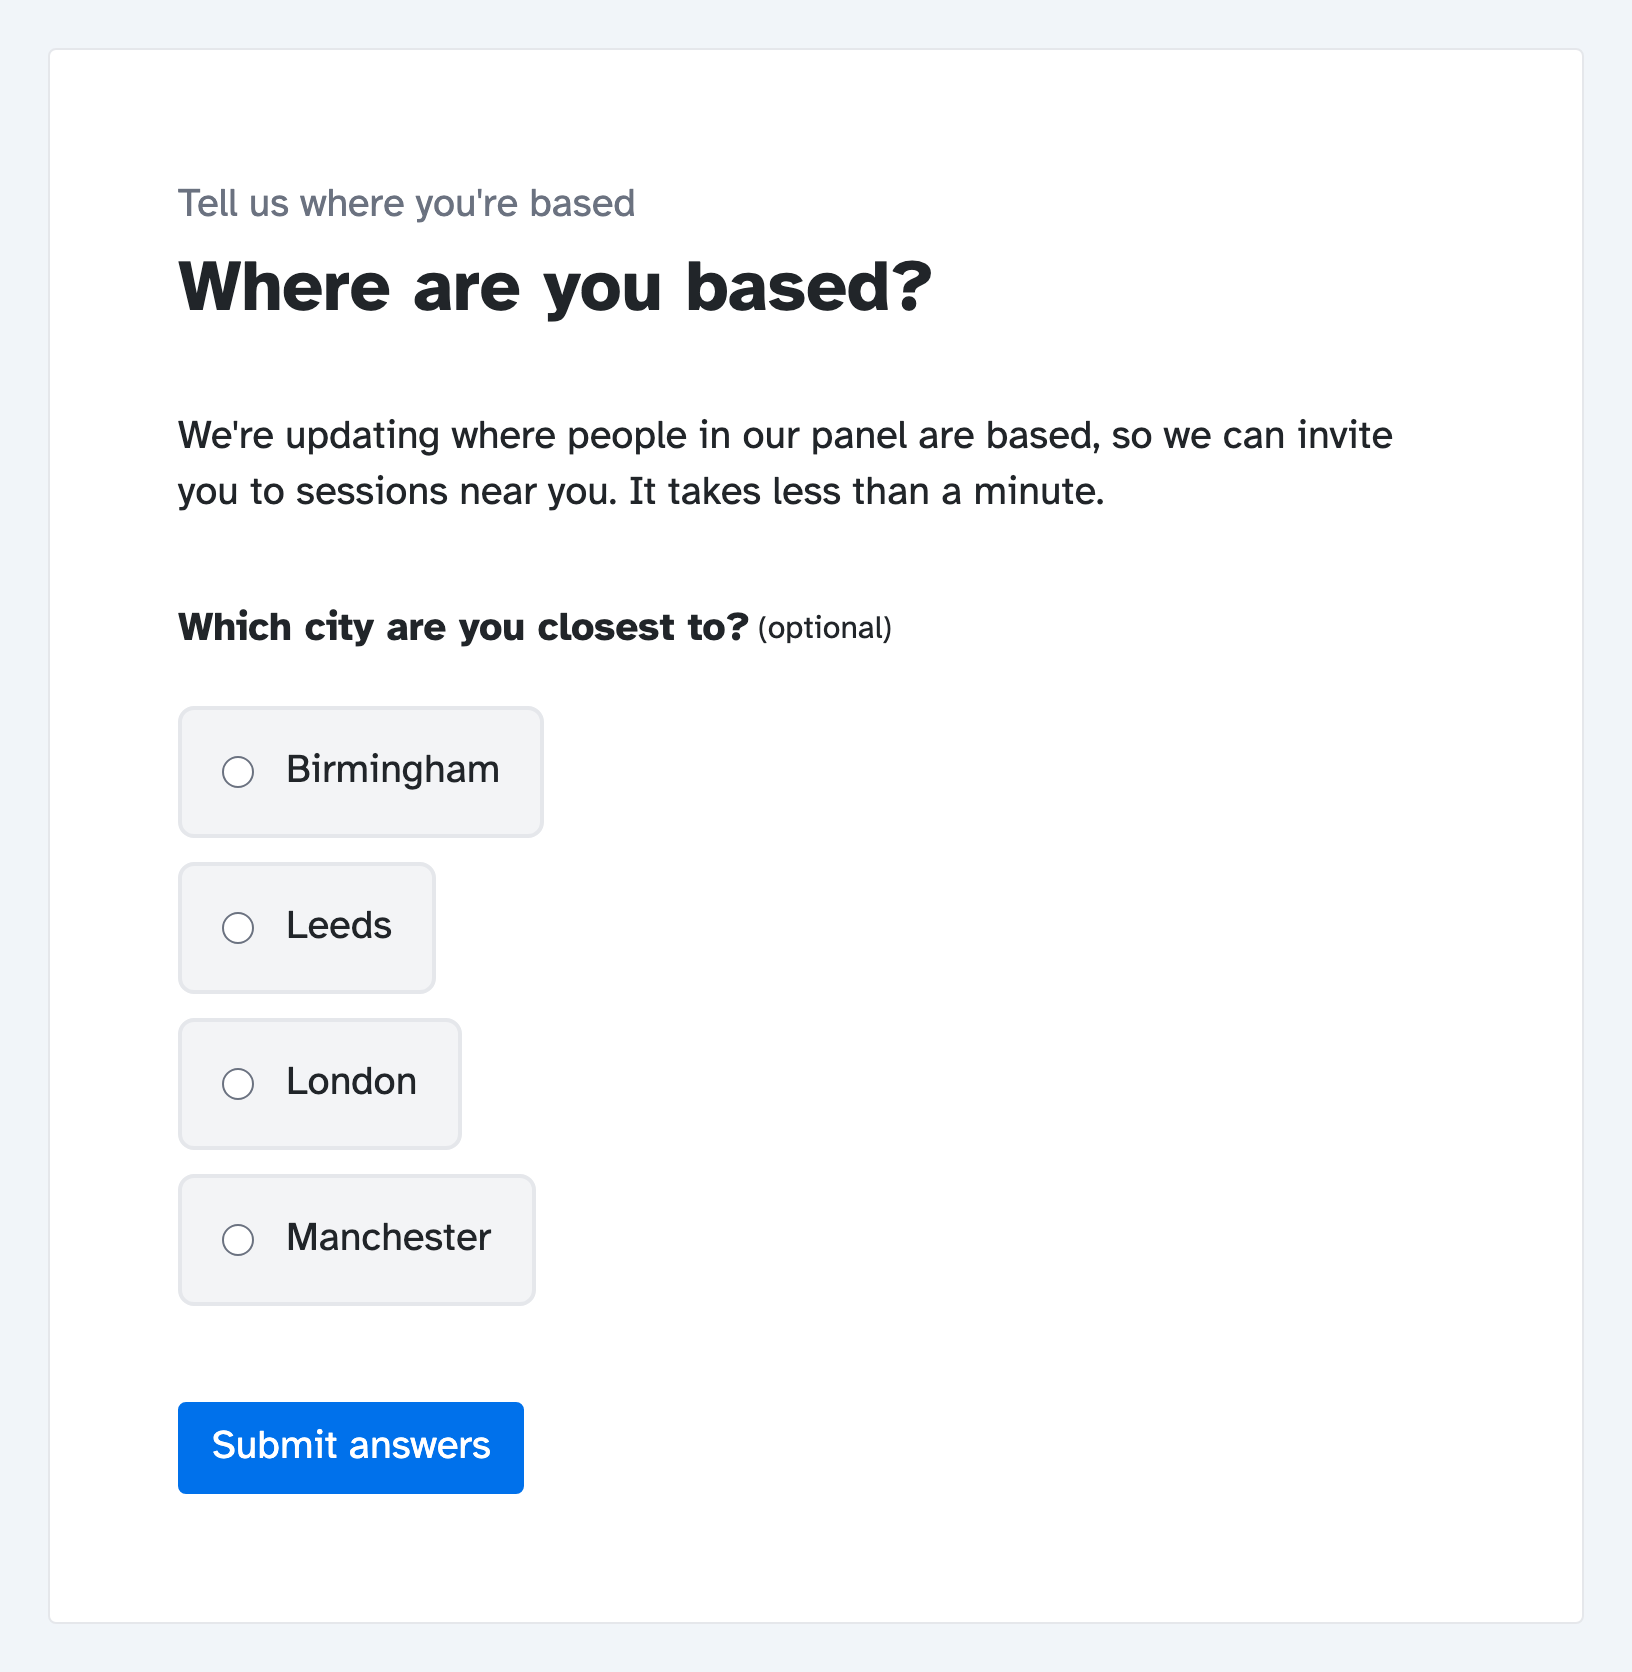
When a panellist opens their link, they see your screener. They answer the questions and click Submit answers.
They can open the same link again to change their answers. The screener starts blank each time. Their new answers replace the old ones in each mapped field. Any question they leave blank keeps its old answer.
If someone who isn’t on the panel opens a screener link, they see a page saying the questions are for panel members. If your panel’s main sign-up form is open, the page also has a button to join the panel.
Find people by their answers
Mapped answers are saved straight to each person’s panel record. Use your panel’s filters to find people by them, for example everyone who uses an Android phone. See Filtering your panel to find the right people.
Stop collecting answers
When you have enough answers, go to the screener’s Settings tab and click Close form. Anyone who opens a link to it after that, including links in emails you’ve already sent, sees a page saying the form is closed, with your Public title in the message.
To start collecting answers again, click Re-open form.
Key takeaways
💡 Remember: Only mapped answers show in your panel table and filters. Map every question you’ll want to search on.
🧪 Try: Ask about one or two things you always wish you knew when recruiting, like which devices people use.
⚠️ Watch for: Every open screener on the panel appears under Select screener, even unfinished ones. Check the name before you send.
⚡ Quick tip: Set a Public title before you send. Panellists see it on the screener and on the closed page.